- Print
- DarkLight
- PDF
The Ticket Types screen allows you to view all existing ticket types and create new ones. Click any ticket type to open it for editing.
To add a new Ticket Type, just click the  button at the top right.

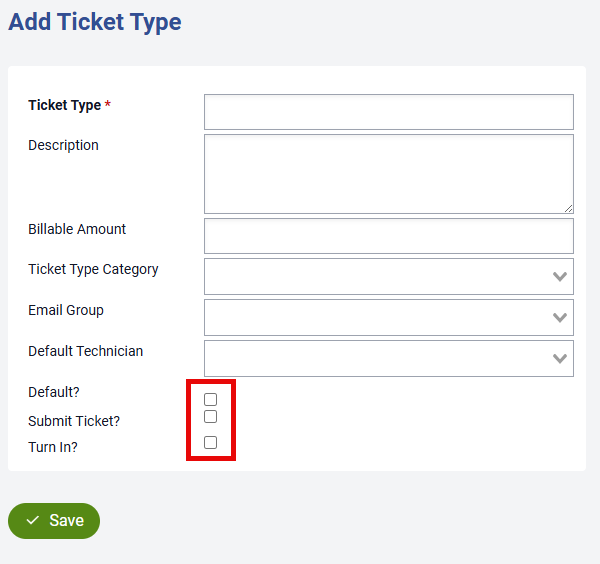
Enter the following information to create your new ticket type:
Ticket Type: Type the name of the new Ticket Type.
Description: Add a description, if necessary (description will not show to users).
Billable Amount: Add an amount associated with this ticket type. This can be used for creating invoices based upon the Ticket Type selected when the ticket is created.
Task Type Category: Select the Ticket Type category from the dropdown that best fits this type. Choosing the correct category helps end users easily find the appropriate option as well as for reporting purposes.
Email Group: Choose an email group to be notified whenever a ticket of this type is created.
Default Technician: Assign the technician that this Ticket Type will default to. This selection overrides the Site’s default technician setting.
Default?: Sets this Ticket Type as the default option on the Submit Ticket screen.
Submit Ticket?: Displays this Ticket Type as a selectable option for users on the Submit Ticket screen.
Turn In?: Displays this Ticket Type as an option on the Turn In screen within the Create Ticket section.

You will also have the ability to choose Knowledge Base articles that are related to this particular Ticket Type. Multiple articles can be selected.

Once you've done this be sure to click  to save the new Ticket Type.


