Turning in an Asset and Creating a Ticket/Invoice
- 20 Nov 2025
- 2 Minutes to read
- Contributors


- Print
- DarkLight
- PDF
Turning in an Asset and Creating a Ticket/Invoice
- Updated on 20 Nov 2025
- 2 Minutes to read
- Contributors
- Print
- DarkLight
- PDF
Article summary
Did you find this summary helpful?
Thank you for your feedback!
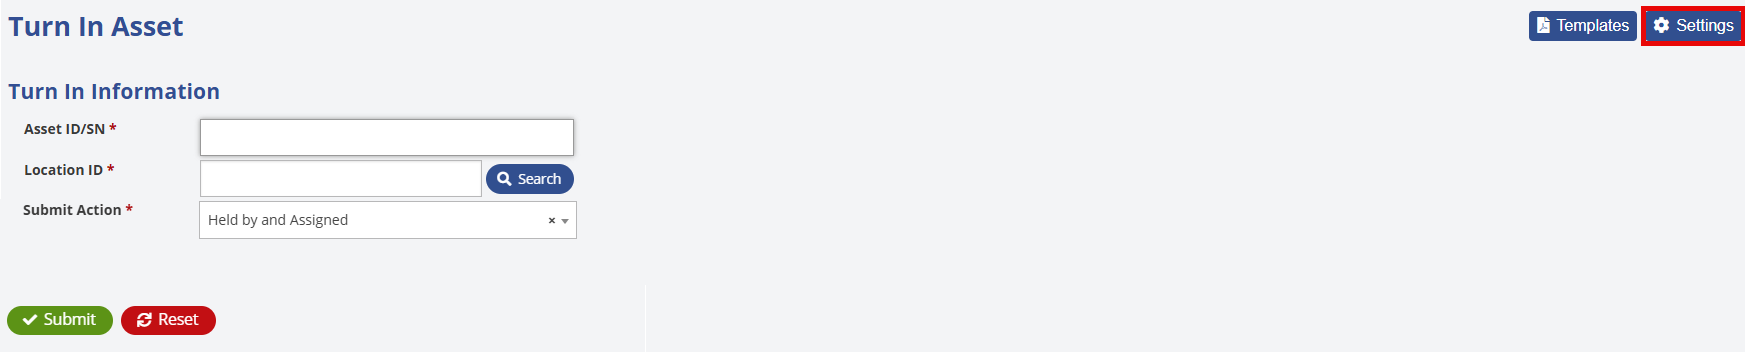
The Turn In screen is used to turn in assets that have been previously assigned to staff or students. The screen is optimized for use with barcode scanners which streamlines the turn in process.
When turning in assets, you also have the option to create a help desk ticket for any damages and generate a billable invoice, if needed.
To enable this functionality, a specific setting must be turned on.
On the Turn In screen, click the Settings button located in the upper-right corner.
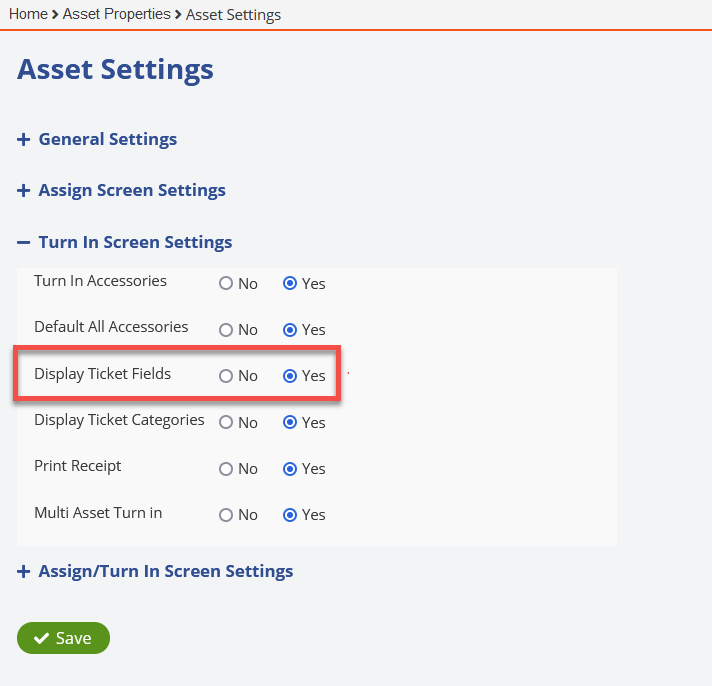
Then click Turn In Screen Settings to expand it.
In this section, locate the Display Ticket Fields option and set it to Yes to enable it. Then, click ![]() to apply your changes.
to apply your changes.
To return to the Turn In screen, simply click the Turn In tab on the left-hand menu.
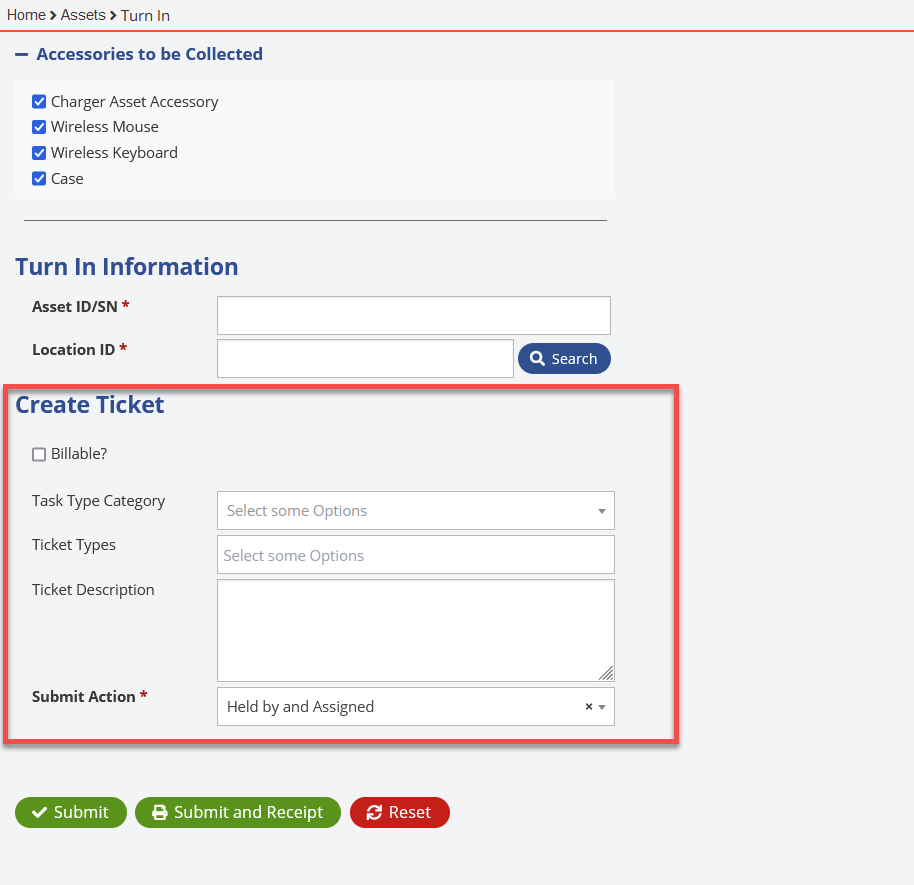
You should now see the Create Ticket section on the Turn In screen. The Billable? checkbox allows you to generate an invoice for any damages once the device is turned in.
Clicking the Ticket Types dropdown will display a list of available ticket types that best describe the issue. (These ticket types can be customized under Settings > Tickets > Types.)
You can also use the Ticket Description field to add notes or provide a detailed explanation of the issue.
Additionally, the Submit Action field has been moved to this section and should default to Held by and Assigned.
From this point, you can begin the asset turn-in process by following the steps below:
Enter Asset Information
Scan or manually enter the Asset ID or Serial Number into the Asset ID/SN field.Enter Location Information
Scan or enter the Location ID into the Location ID field.
Alternatively, click the button next to the field to open the Location Search dropdown, where you can select the appropriate location or type to search.
Create a Help Desk Ticket (Optional)
In the Create Ticket section:Select a Ticket Type that best describes the damage to the device.
(Ticket types can be customized under Settings > Tickets > Types.)Check the Billable? box if you need to generate an invoice for the damages.
Note: Leaving this box unchecked will still create a help desk ticket, but no invoice will be generated.
Verify the Submit Action Field
Make sure the Submit Action field is set to Held by and Assigned.This is the default setting, but it can be changed in Settings > Assets > Asset Settings > Assign/Turn In Screen Settings.
Use Held by and Assigned unless you only want to update the Held by field. For example, if a student’s device is collected at the end of the school year and will be reassigned to them in the fall, you may update the Held by status to school inventory for the summer and reassign it later.
Complete the Turn-In Process
Click
 to complete the turn-in and, if applicable, create a help desk ticket and invoice.
Click
 to clear all fields and start over.
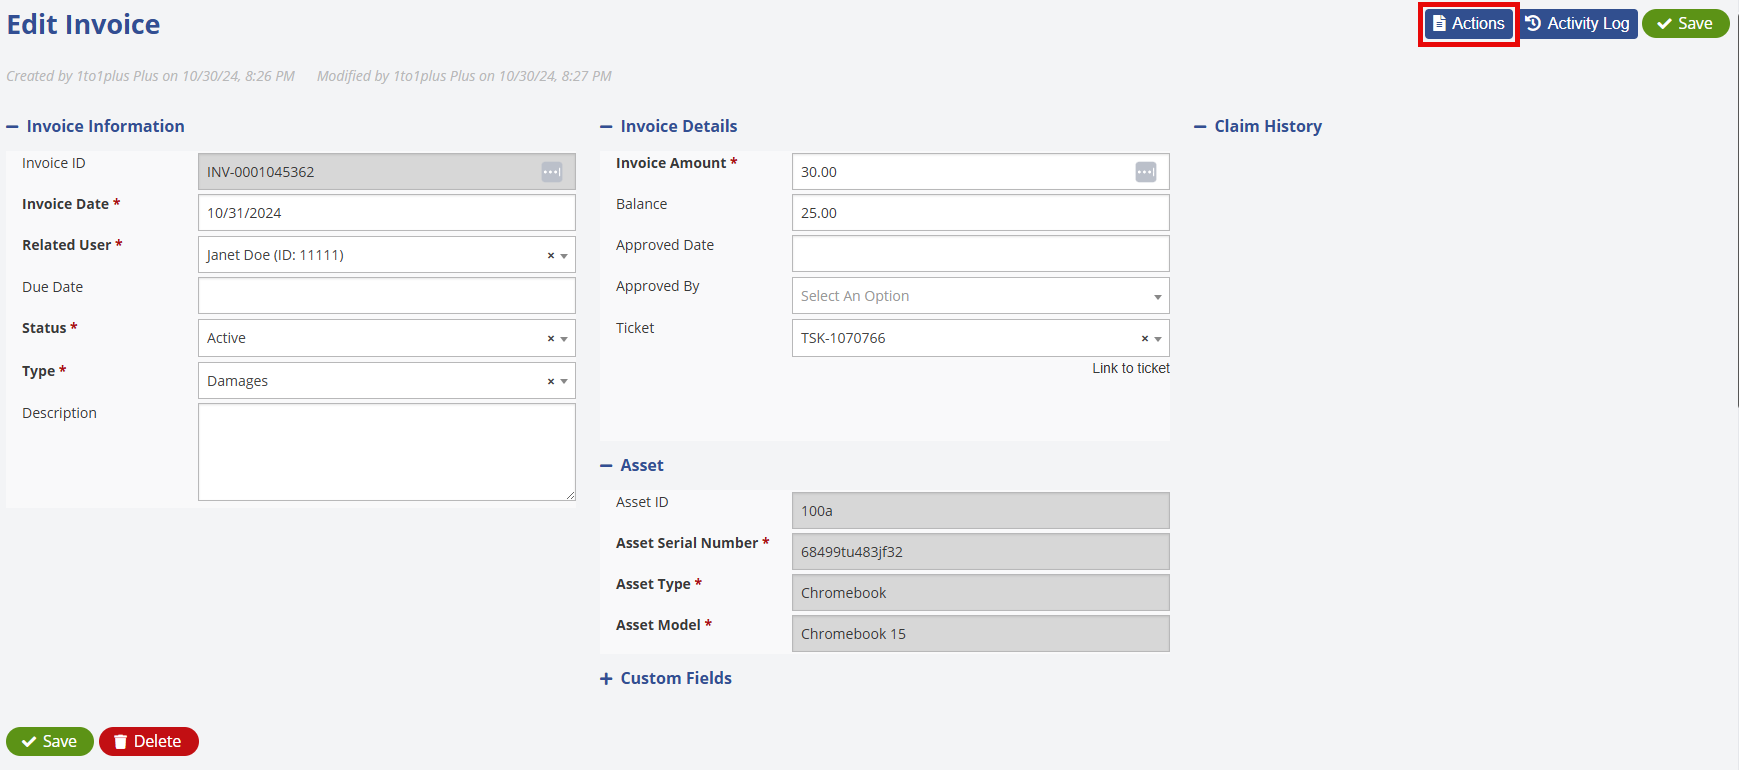
If an invoice is being created for damages, the next screen after clicking  will appear as follows:
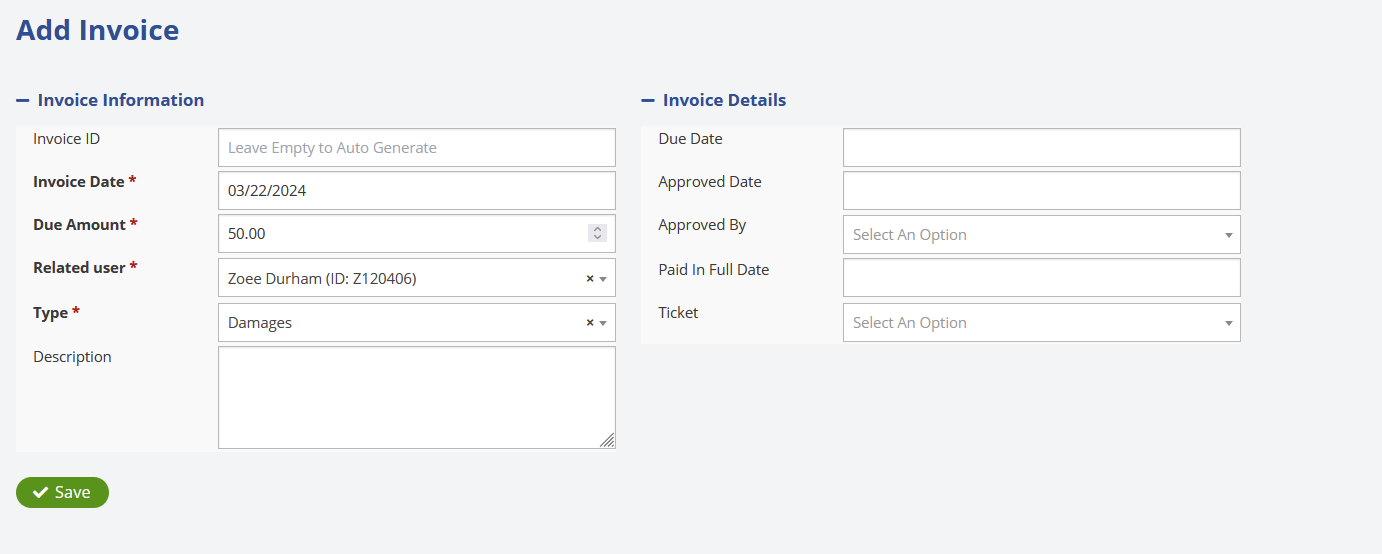
Fill in the required fields, along with any additional relevant details, and click ![]() . An invoice number will be generated automatically. To manage the invoice, click the Actions button in the top-right corner—this allows you to Download, Print, or Email the invoice.
. An invoice number will be generated automatically. To manage the invoice, click the Actions button in the top-right corner—this allows you to Download, Print, or Email the invoice.
When selecting the Email option, you can send the invoice to any recipient, including the student’s parent or guardian.
At this point, you can return to the Turn In screen to continue processing devices by clicking the Turn In tab in the left-hand menu.
Was this article helpful?