- Print
- DarkLight
- PDF
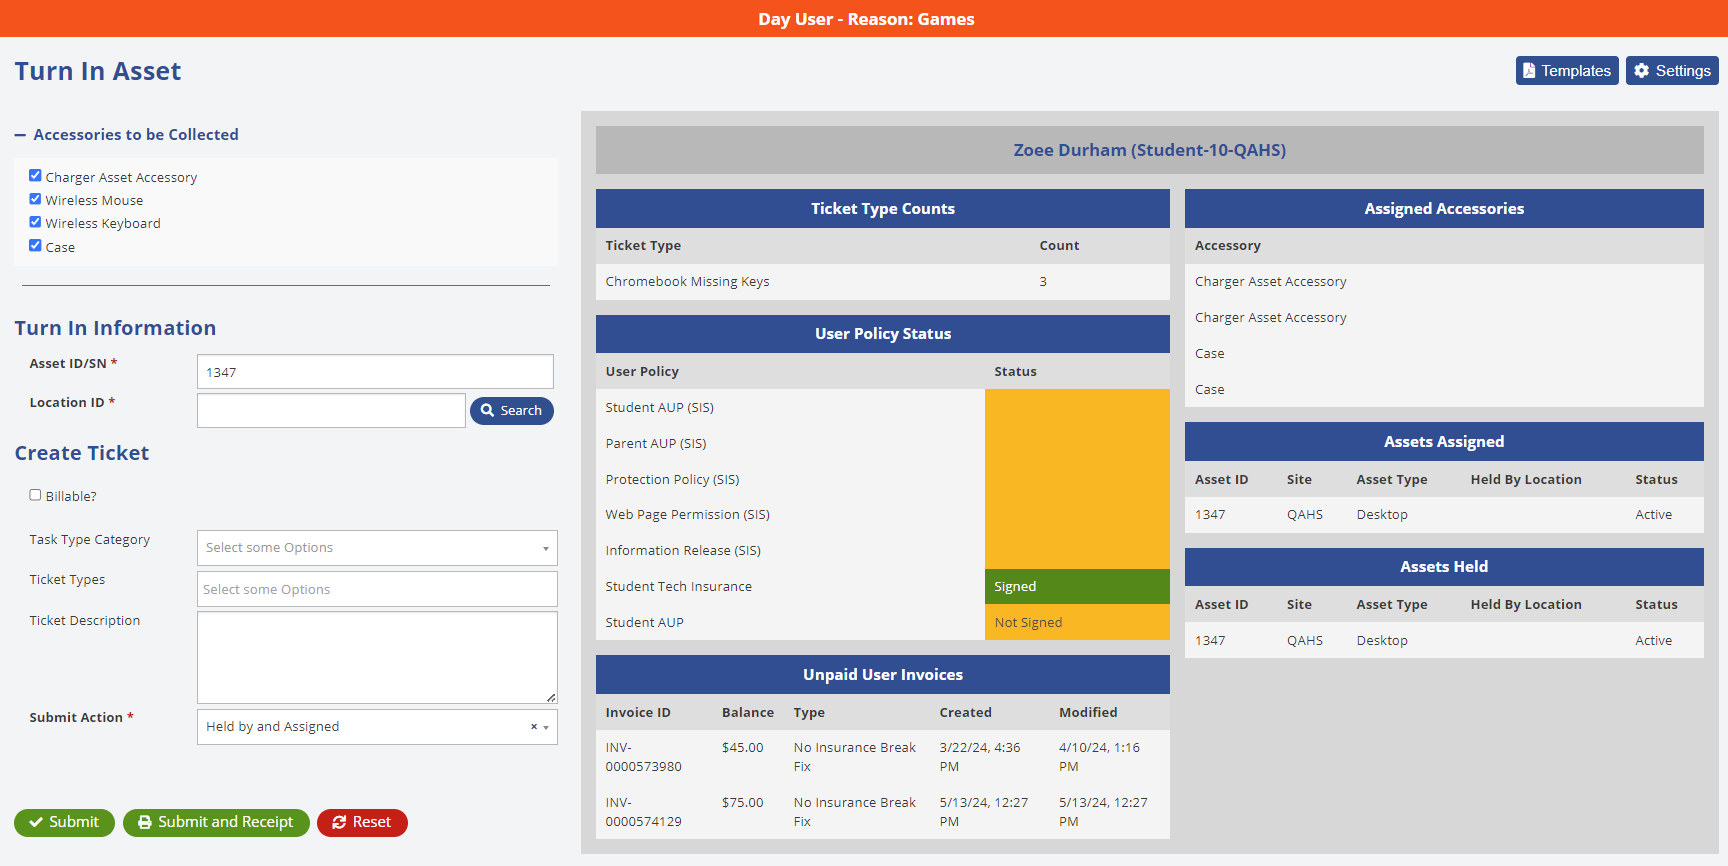
The Turn In screen is designed for returning assets previously assigned to staff or students. Optimized for use with barcode scanners, it streamlines and simplifies the Turn In process. 

Scan or enter the Asset ID or Serial Number into the Asset ID/SN field. An information panel will appear, displaying helpful information about the asset and the associated user. If any restrictions are in place for the user, a banner will be shown as a reminder.

Scan or enter the Location ID into the Location ID field. Also, you can click the
 button next to the field to open a drop down menu. From there, you can either scroll to select the desired location or begin typing to search for it.
Ensure the Submit Action field is defaulted to Held by and Assigned. (The default Action can be changed in the Settings > Assets > Asset Settings)
The 'Held By and Assigned' option should be selected by default, unless you intend to update only the 'Held By' field. For example, if a student’s device is collected at the end of the school year but will be reassigned to the same student for the following school year, you can update the 'Held By' field to indicate the device is held by school inventory during the summer, and then reassign it to the student in the Fall."
Click the
 button to finish turning in the asset. You can also click the
  button to clear out the previously mentioned fields.
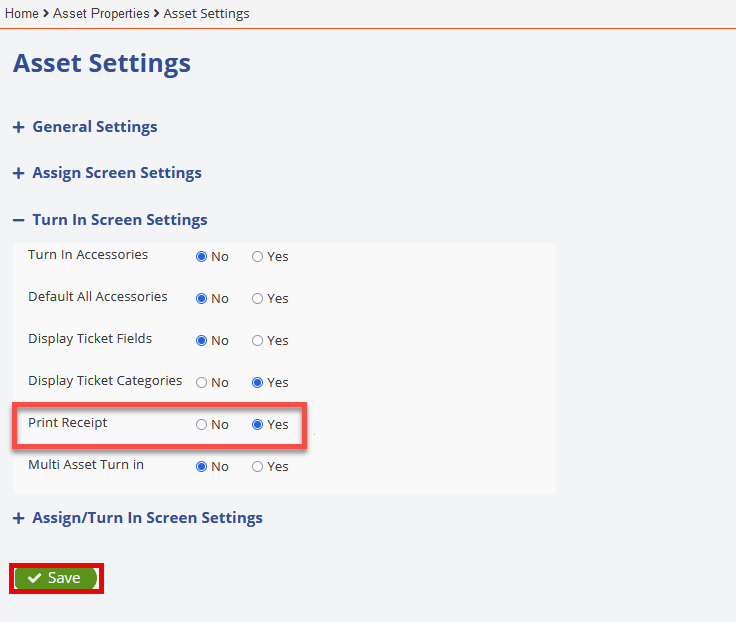
When turning in an asset, you have the option to generate a receipt immediately. This feature also allows you to email the receipt directly to the recipient.In order to do this you will need to go to the Settings button in the top right and click on the Turn In Screen Settings to expand it.

Turn the option for "Print Receipt" to Yes and click the ![]() button to save the changes.
button to save the changes.

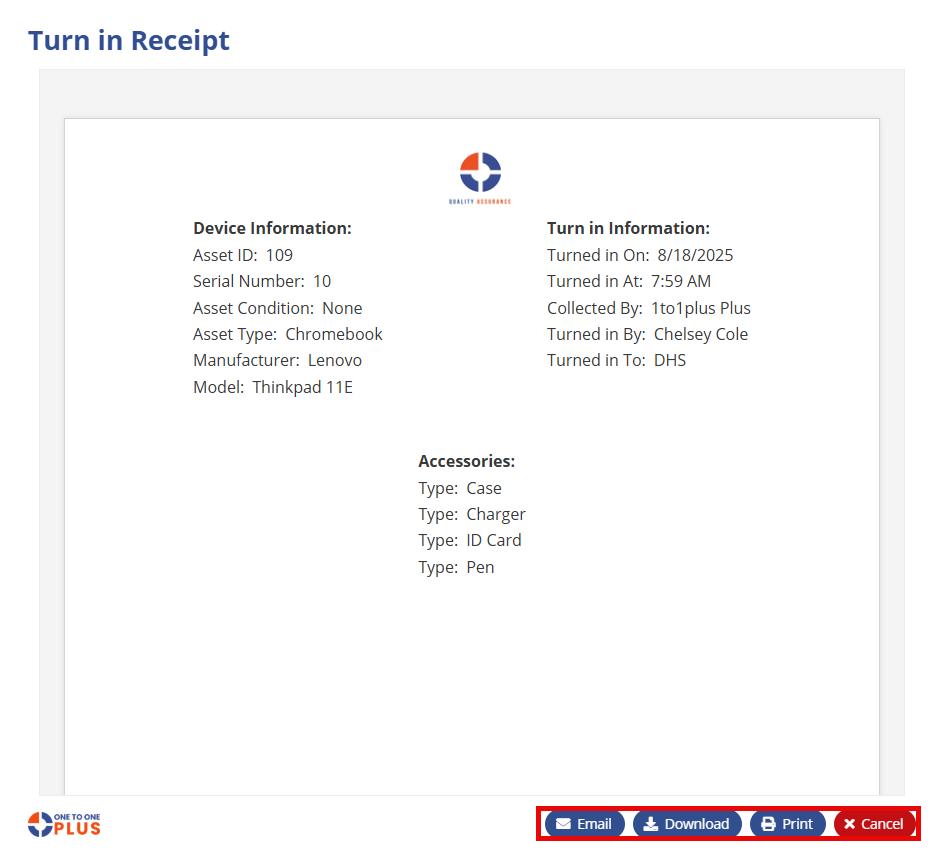
Once you turn in an asset, a receipt will automatically appear on your screen, giving you the option to email, download, print, or cancel it.


