- Print
- DarkLight
- PDF
The Submit Ticket Settings screen lets you customize ticket forms to fit your specific needs. You can configure each scenario by selecting which fields are required for users to submit their tickets.
Your system will have one default form, this form can be modified to fit your needs or deleted. You can add additional custom forms if you would like.
When you click on Submit Ticket Settings tab, you will see a "+ New Form" button (see below). Click this to add a new ticket form.

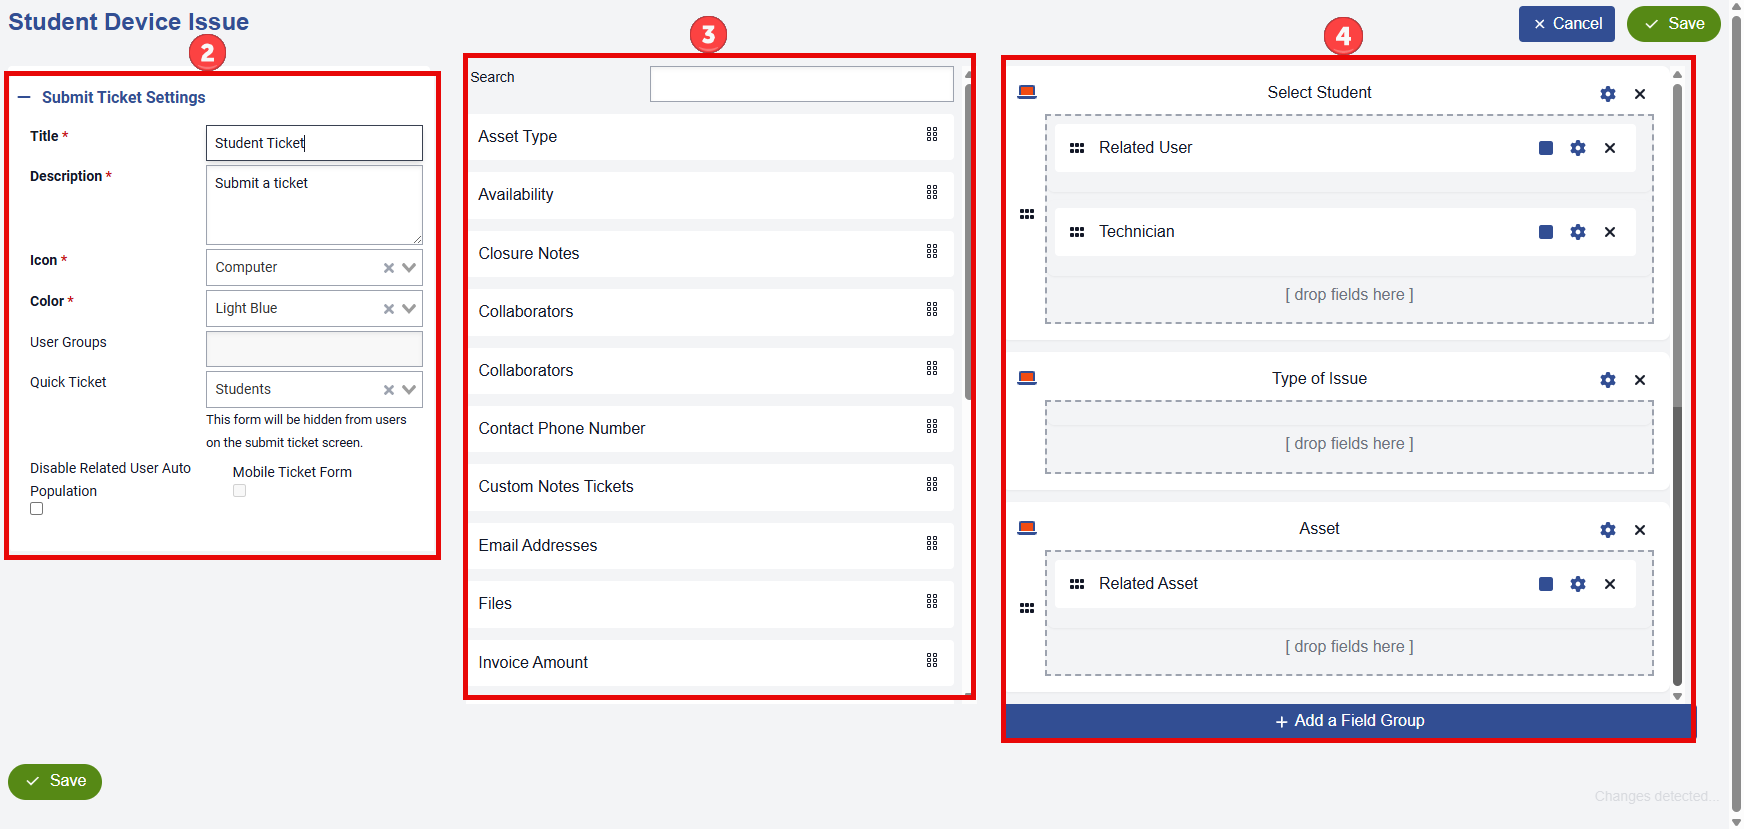
There are four required fields for creating a ticket form, all of which can be found in section 2 below: Title, Description, Icon, and Color. These elements will appear on the tab in the Submit Ticket screen under the Help Desk section of the software. The User Groups field allows you to specify which groups can access each individual form. If left empty, the form will be visible to all users. Additionally, if the Disable Related User Auto Population flag is enabled, the related user field on the Submit Ticket screen will no longer auto-populate. The Mobile Ticket Form flag will let you select a praticular Submit Ticket form to be used in the Mobile App. Only one form can be flagged for Mobile at a time, Any form that is flagged as Mobile will not be available for ‘Web App’ use.
All relevant and available fields, including custom fields, for your form are listed in the Form Fields section (section 3). To add a field, simply click the right side of the desired field and drag it to section 4. You can rearrange the fields in any order by dragging them. Additionally, you can group multiple fields together by placing them within the same group, like this:
/.png)
Each field Group is customizable by clicking the gear icon in the right corner which will bring up this screen:
.png)
Here, you can customize the title, description, and icon for each field group. To modify the label of a specific field within the group, simply click the gear icon next to the field.
To make a field required, click the square next to the field name (see section 4) to add a check mark, indicating that it must be filled out by the user.
To remove a field group or a specific field within the group, click the X to delete it.
.png)

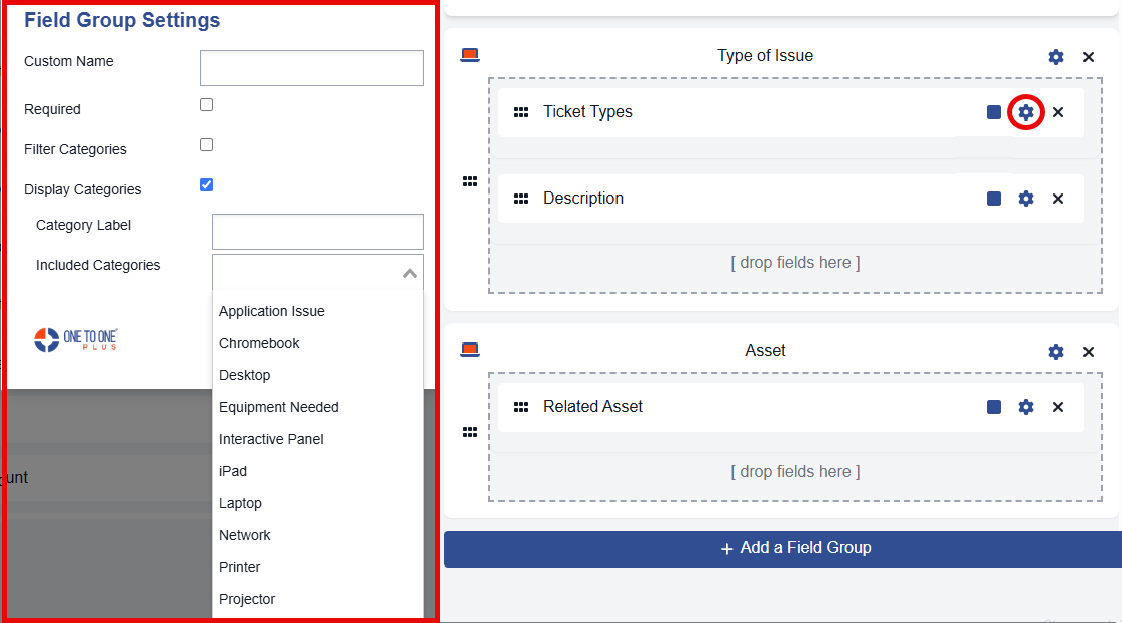
Clicking the gear icon for Ticket Types allows you to select the ticket type categories you wish to display for each form. You can also choose not to show the categories entirely by unchecking the Display Categories box. Additionally, you can rename the Ticket Type Categories field in the Categories Label section

.png)
After making any changes or adding a new form, be sure to click the ![]() button to preserve your updates. The Save button will remain greyed out until a change is made.
button to preserve your updates. The Save button will remain greyed out until a change is made.
The ![]() button will revert all changes on the screen to the state they were in the last time the form was saved.
button will revert all changes on the screen to the state they were in the last time the form was saved.
The ![]() button will completely remove the form.
button will completely remove the form.
The ![]() button exits the screen, and any unsaved changes will be lost.
button exits the screen, and any unsaved changes will be lost.
The ![]() button creates an identical copy of the form.
button creates an identical copy of the form.


