Edit Ticket
- 09 Dec 2025
- 2 Minutes to read
- Contributors


- Print
- DarkLight
- PDF
Edit Ticket
- Updated on 09 Dec 2025
- 2 Minutes to read
- Contributors
- Print
- DarkLight
- PDF
Article summary
Did you find this summary helpful?
Thank you for your feedback!
The Edit Ticket screen allows you to edit a ticket with any details that you would like. Which fields are required on this screen is customizable in the Ticket settings. Staff and Students can not close tickets.
Expand each section to add/edit information that is relevant to the ticket such as Related User, Related Asset, Invoicing, etc. If the ticket is for device damages you can also create an invoice from this screen in the Invoicing section by clicking the Add button. Add a due date for the ticket to be resolved if necessary and add any notes for the ticket in the Notes section. Attach any files or images related to the ticket here also. Files can be upload up to 50mb and the valid file extensions are .jpeg, .jpg, .png, .xls, .xlsx, .doc, .wav, .pdf, .txt, .csv, .docx. The Type Categories and Types fields work together. If you select a type category first, it will filter what is displayed in the types list. If you select one without the other, the system will not save correctly.
The Related User Policies will display “Has Insurance Policy” if the user has a signed policy within One to One Plus or if they have a Protection Policy with a positive value. If the insurance limit has been reached for the school year, it will display “Insurance Limit has Been Reached" in red.
Once all details for the ticket have been added, click the ![]() or
or ![]() button and the ticket will be created. You can then access the ticket record from either the Manage Ticket screen or the My Tickets screen.
button and the ticket will be created. You can then access the ticket record from either the Manage Ticket screen or the My Tickets screen.
The ![]() button saves record and automatically generates emails to users who are flagged to receive emails.
button saves record and automatically generates emails to users who are flagged to receive emails.
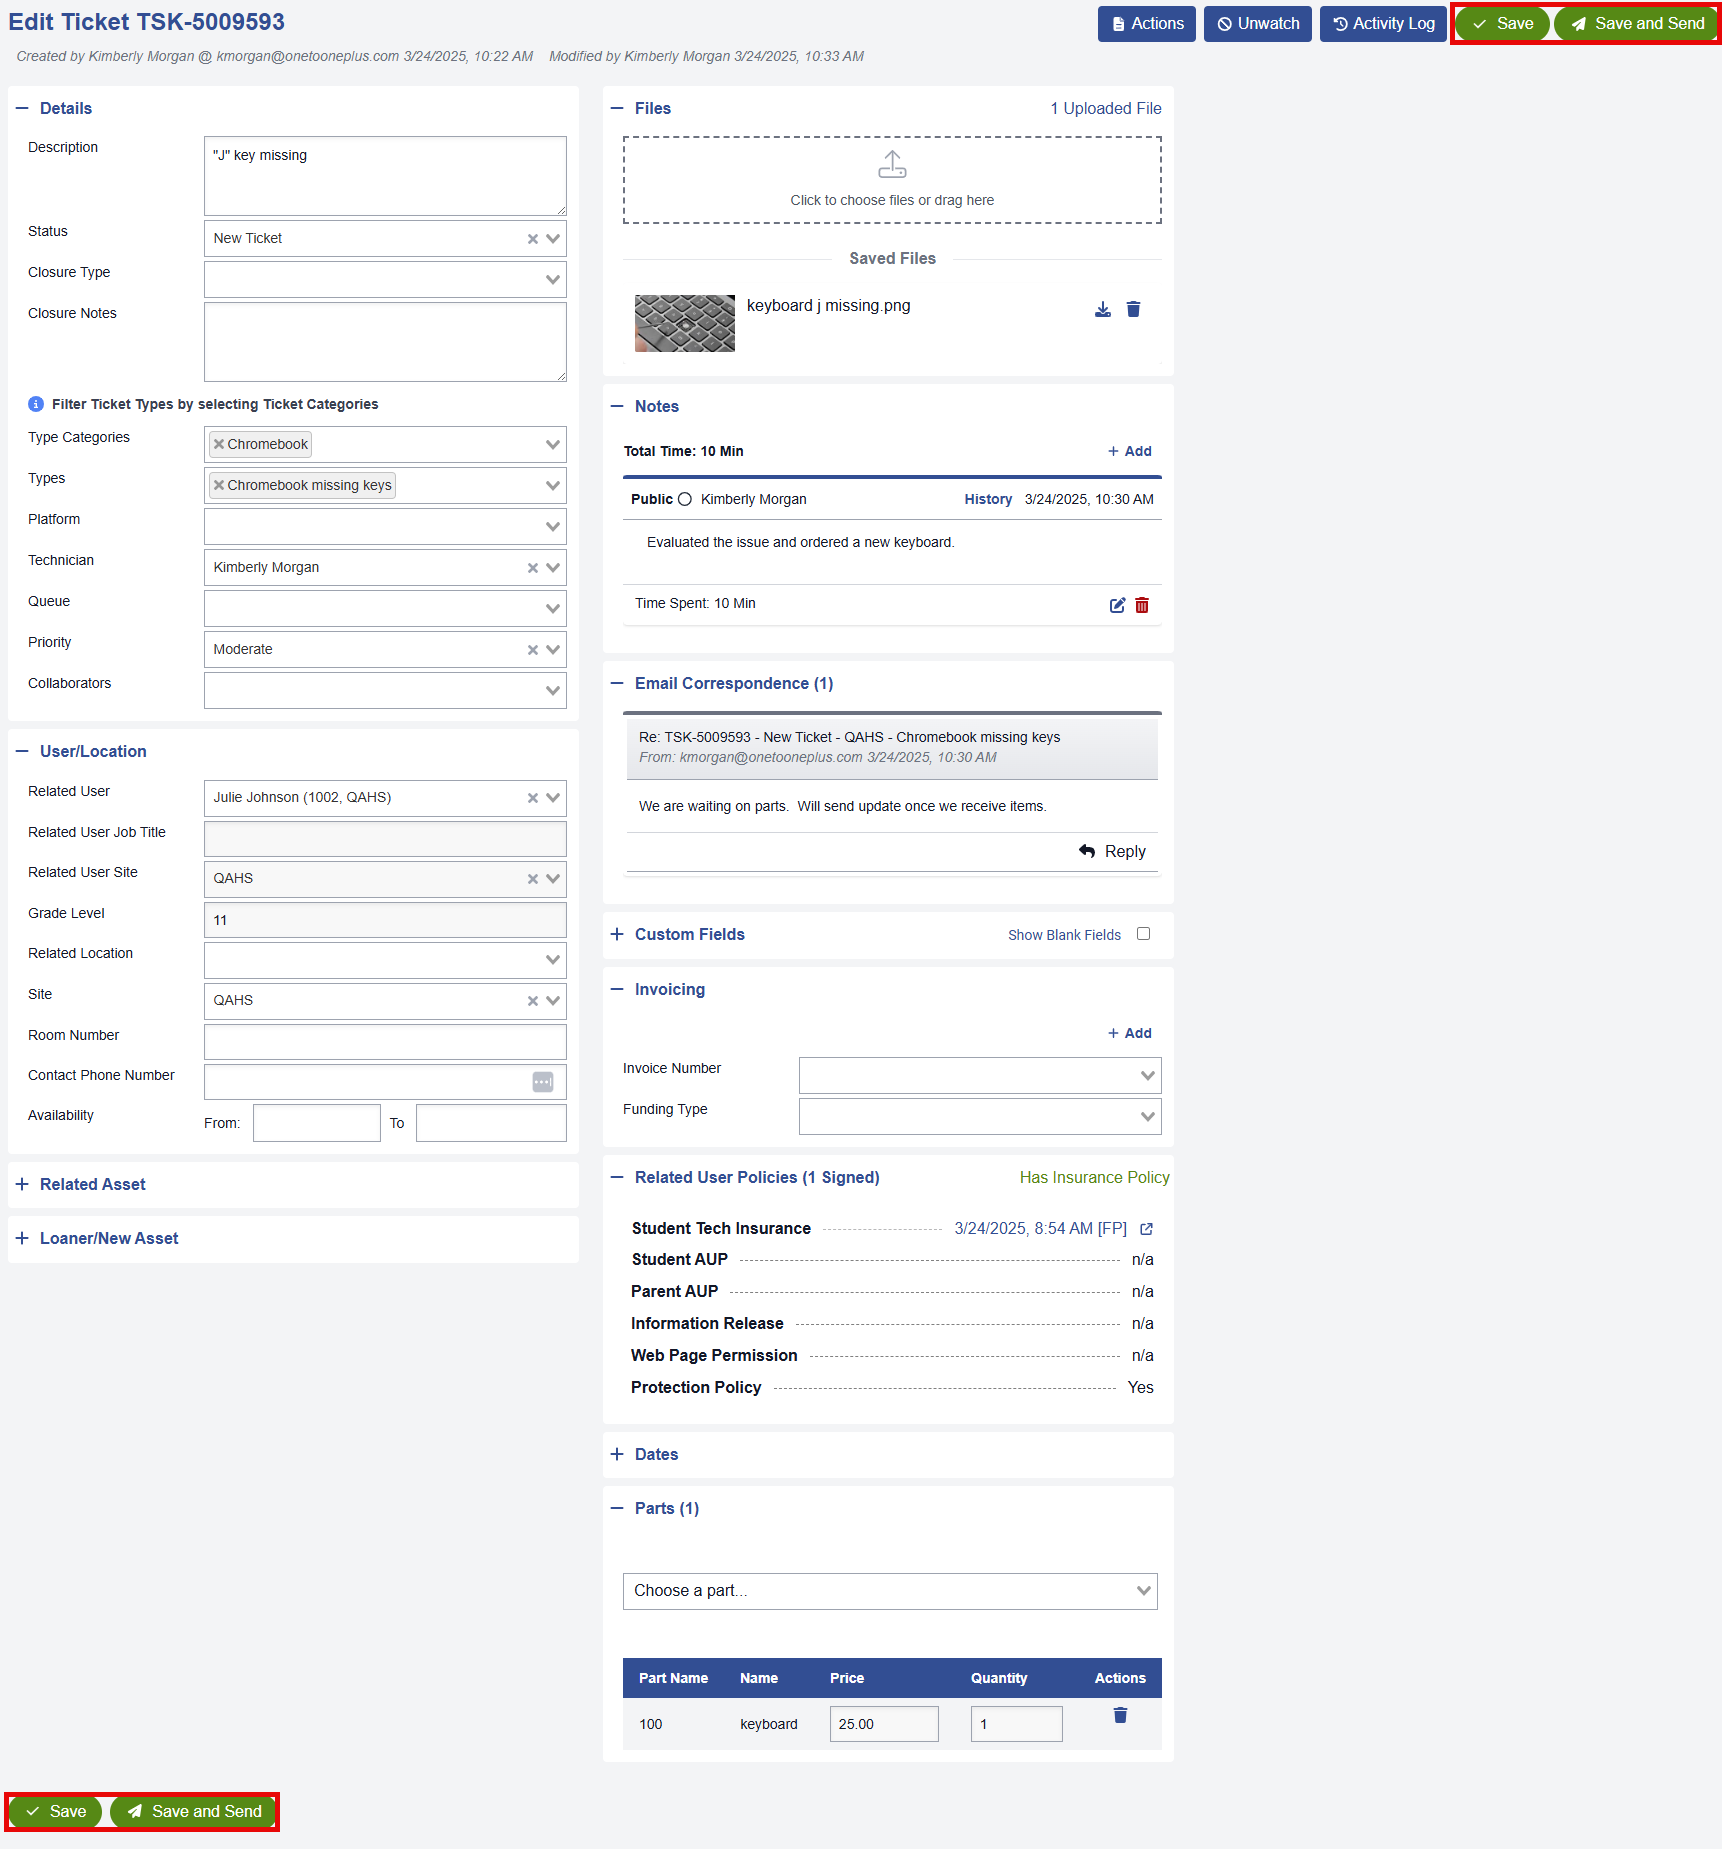
You can choose whether empty custom fields appear on your ticket by using the “Show Blank Fields” or “Don’t Show Blank Fields” toggle located next to the Custom Fields section.

You can now add Knowledge Base articles or templates to the Notes and Correspondence sections when adding or editing tickets. Simply select the desired option to view the available articles or templates, then click on the one(s) you want to attach. The selected items will appear in the body of the note or correspondence.
Enter new note:
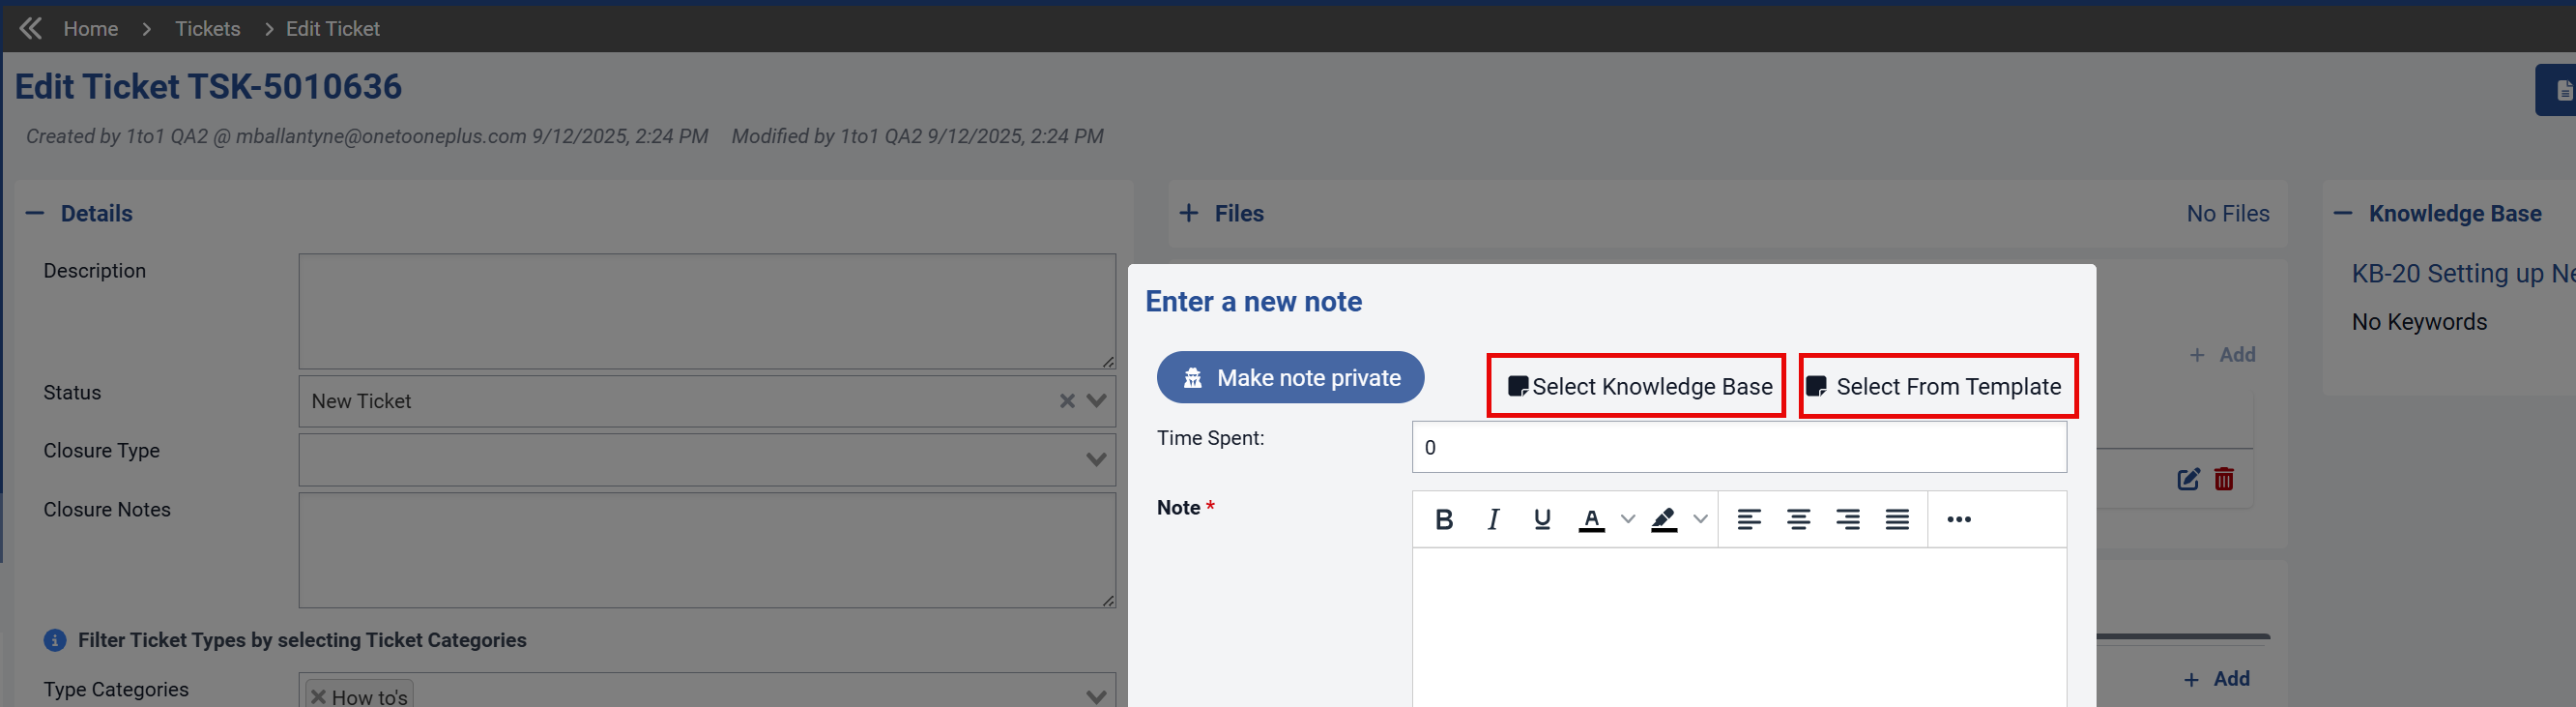
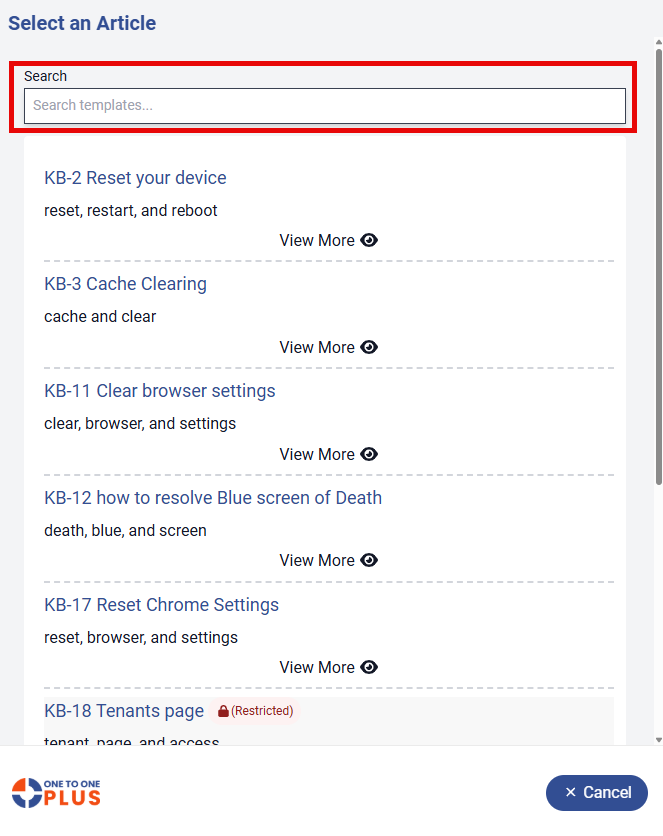
After clicking the Select Knowledge Base icon, a list of available articles will appear. You can also use the search feature to quickly find specific articles and narrow down your results.
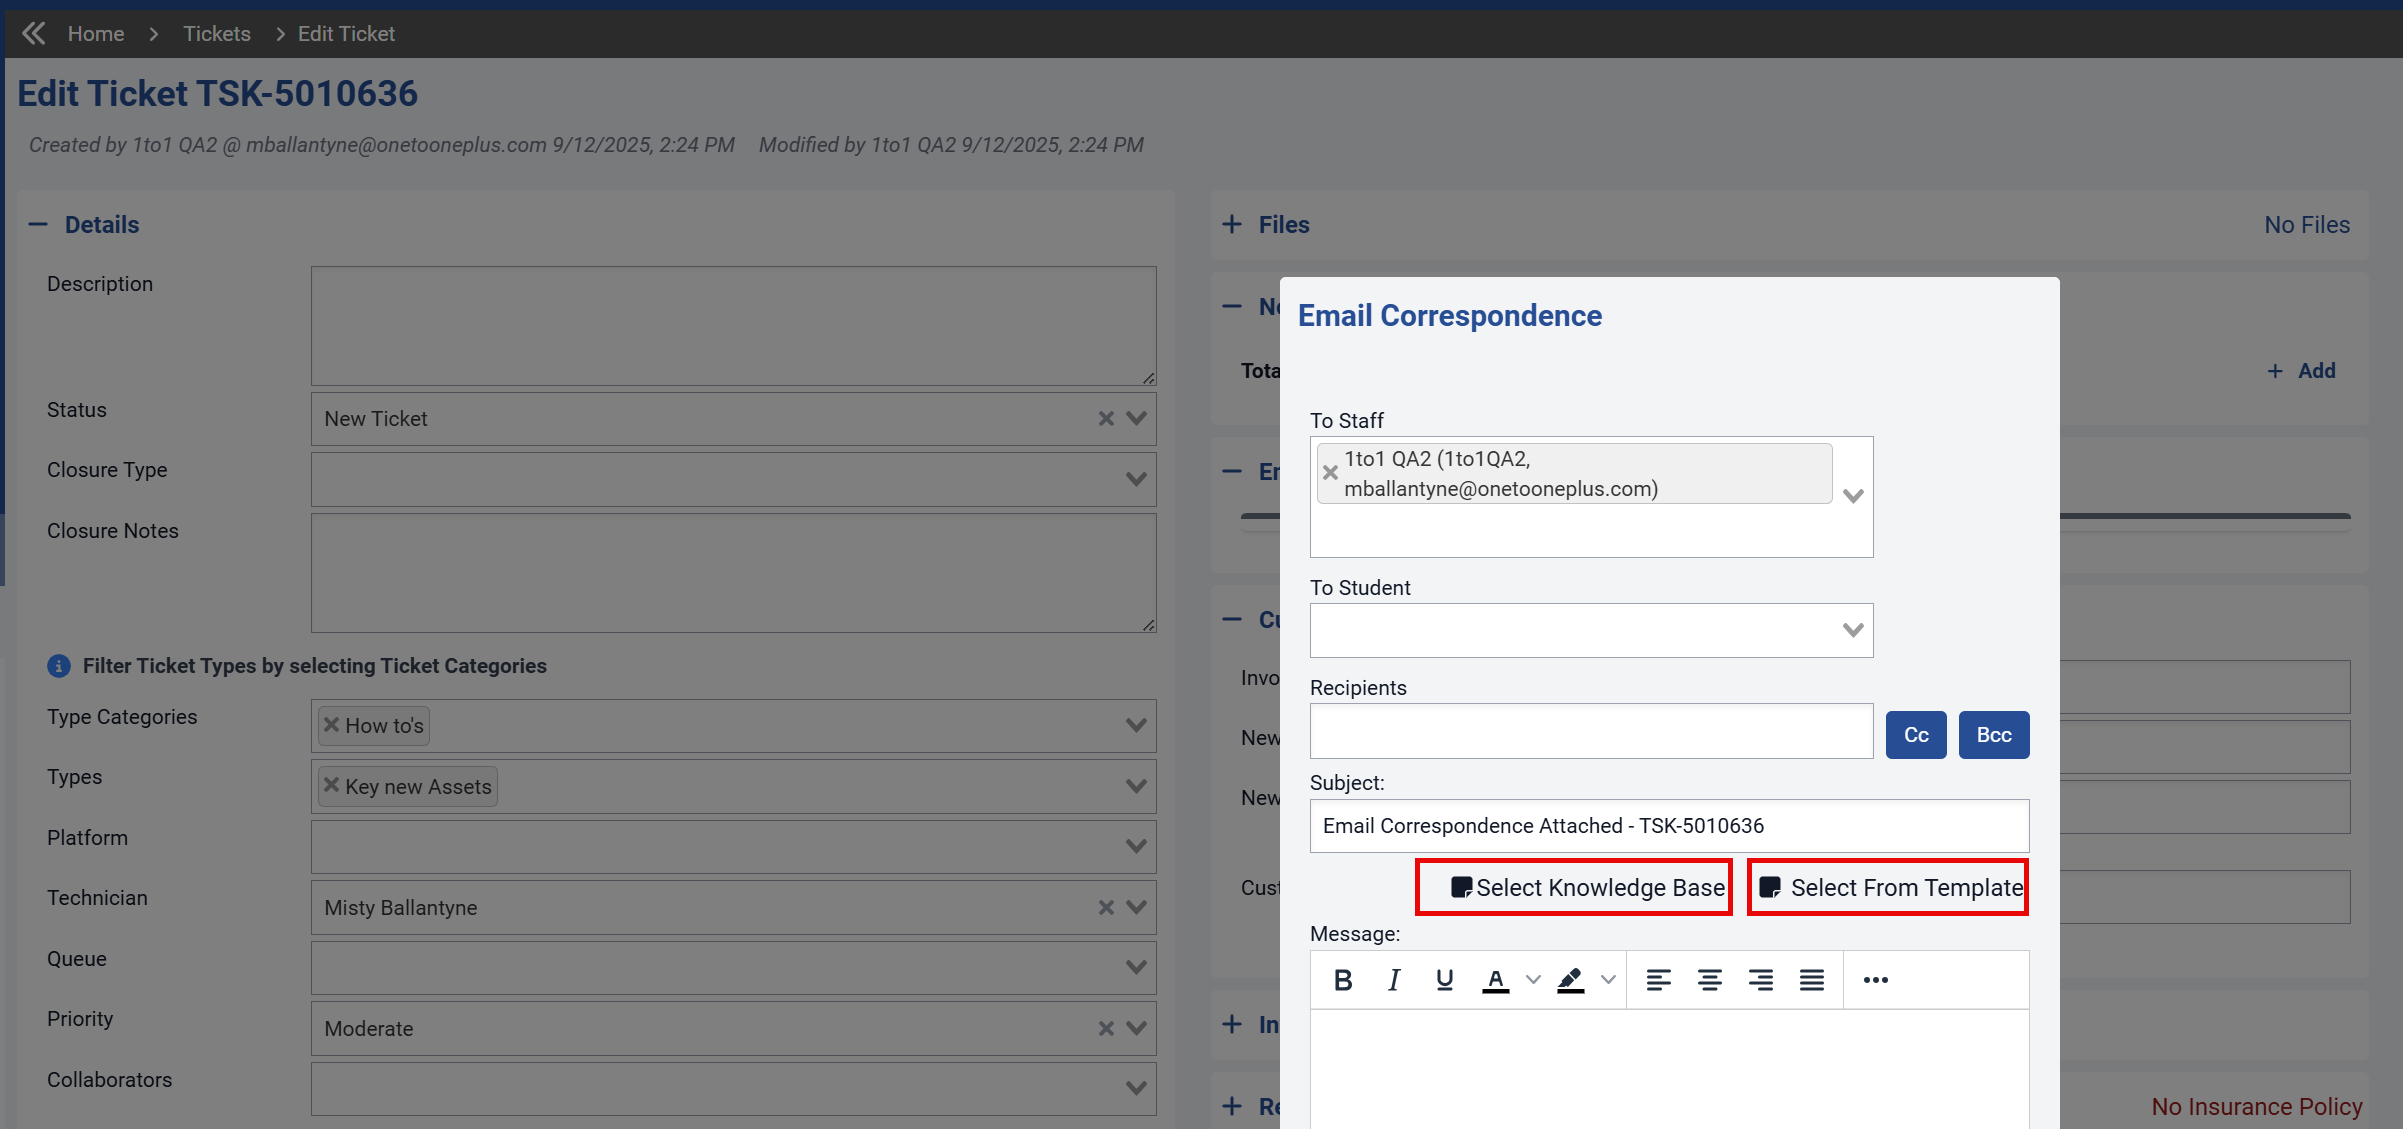
Email Correspondence:
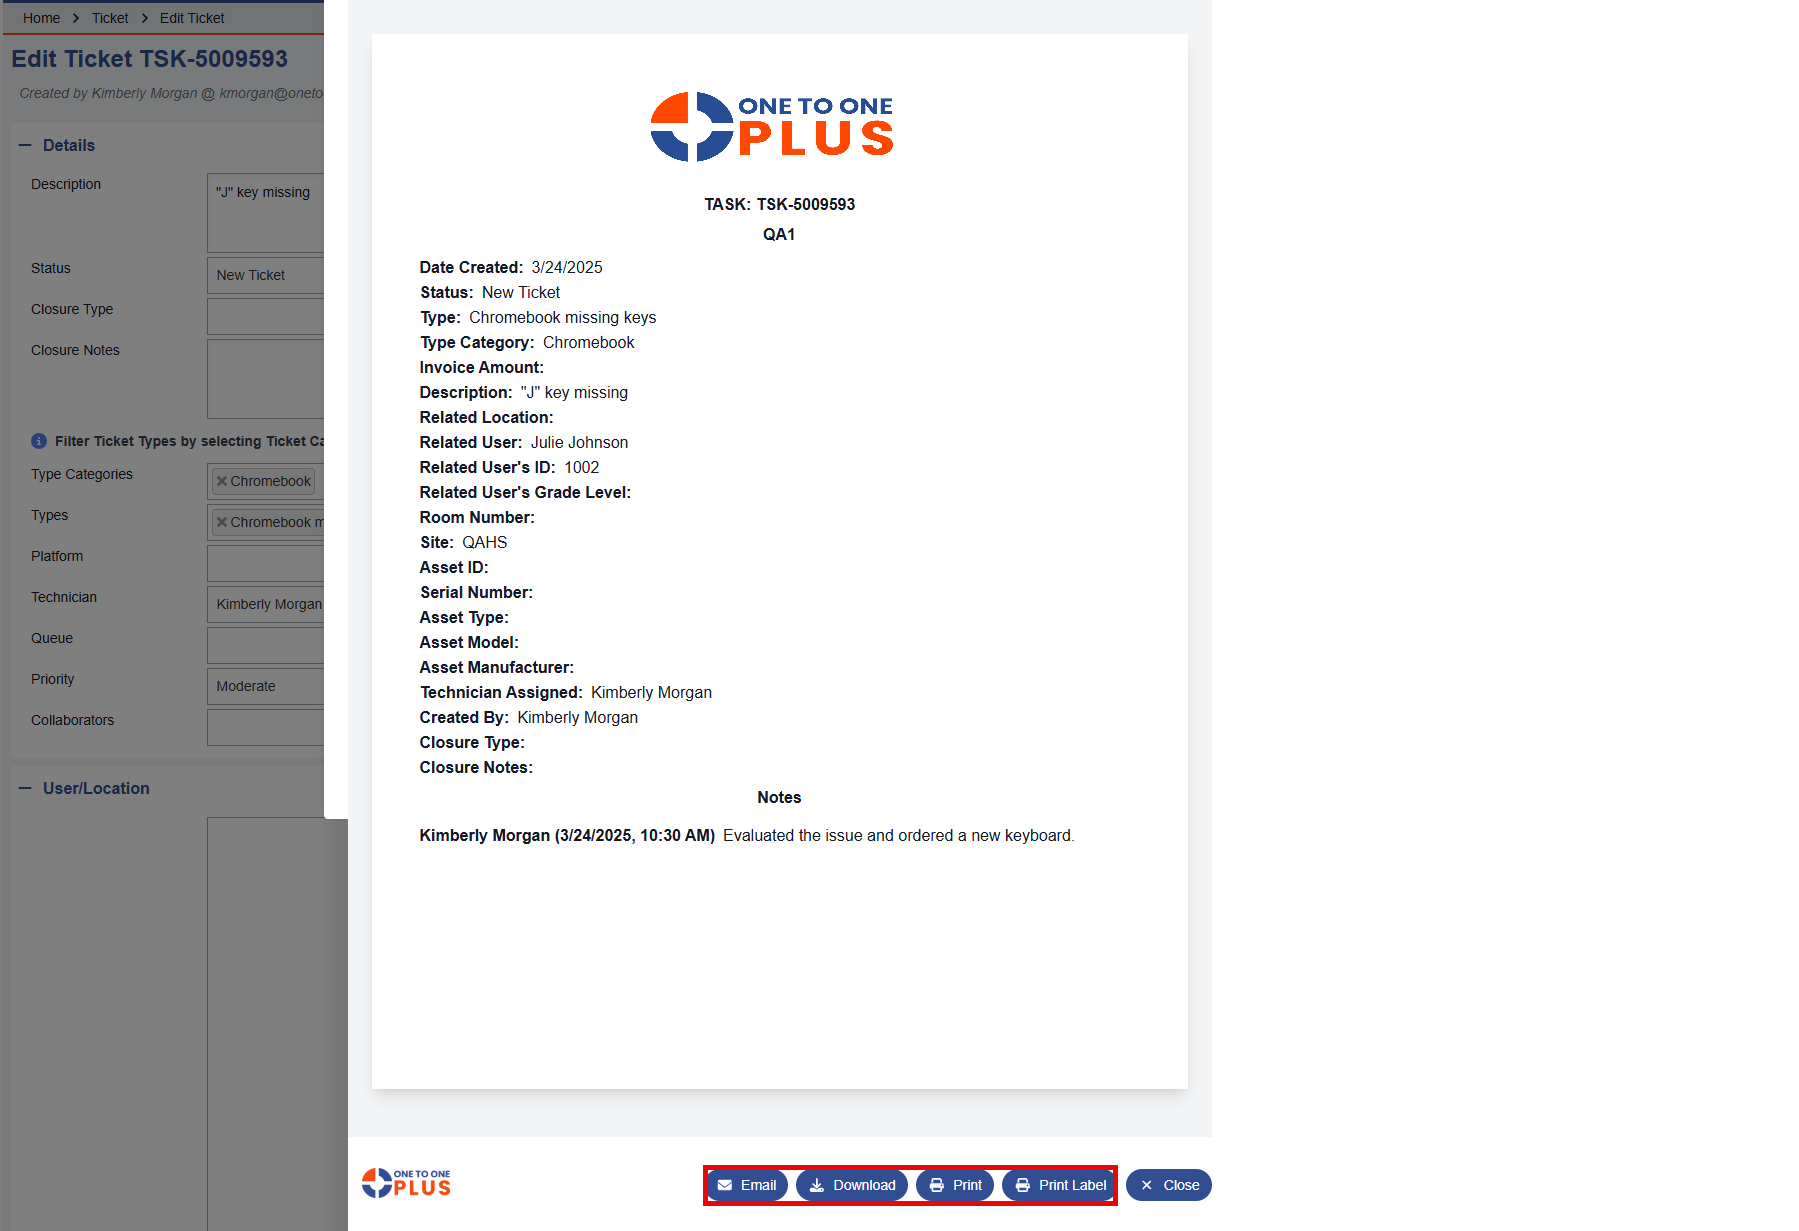
The ![]() button, located in the upper-right corner of the screen, allows you to Email, Download, Print, or Print label for the ticket currently open.
button, located in the upper-right corner of the screen, allows you to Email, Download, Print, or Print label for the ticket currently open.

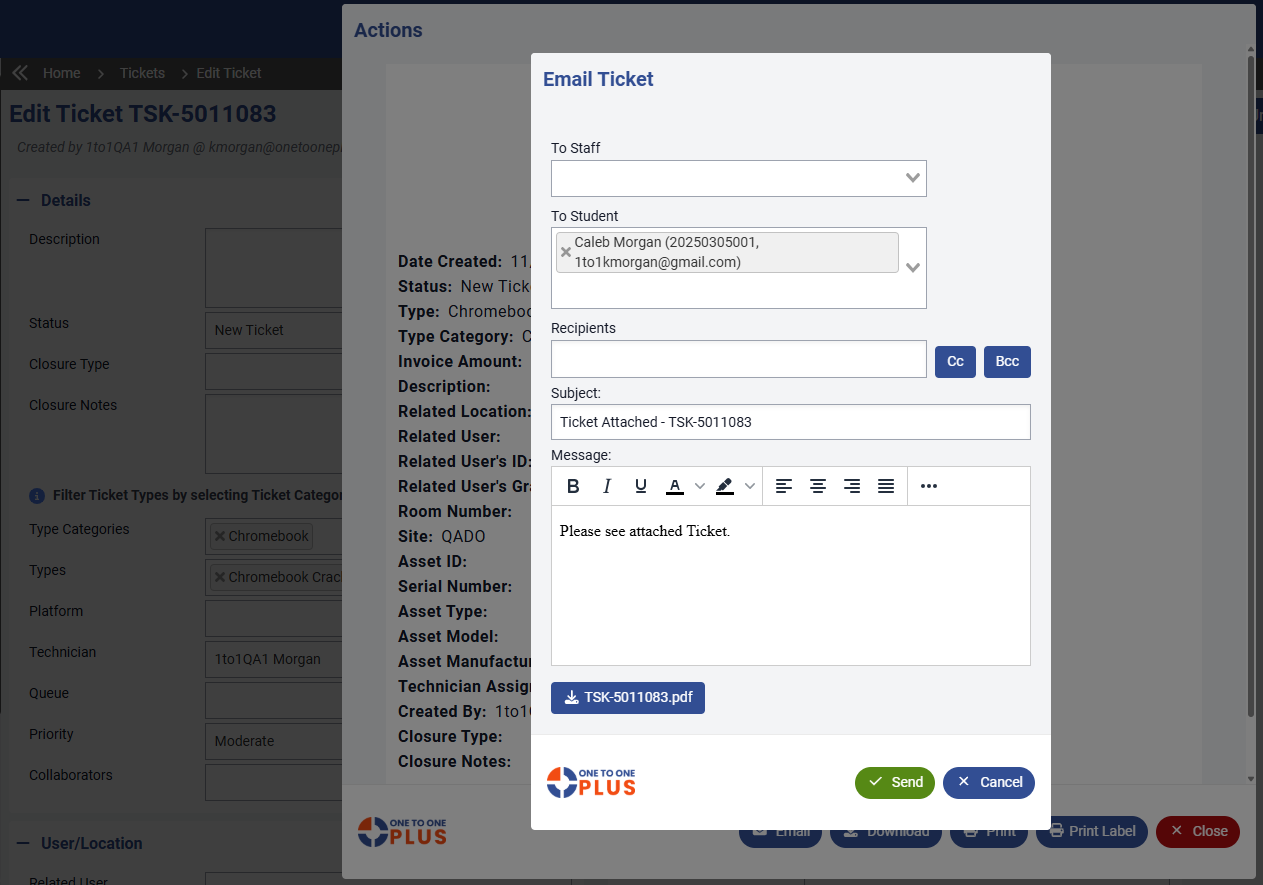
If you select ![]() , a new window will appear with a copy of the ticket automatically attached. From here, you can send the ticket to staff, students, or other recipients such as parents or guardians, and include a personalized message if desired. By default, the student’s responsible party email addresses are automatically pulled from the student record, but you can remove or add additional recipients as needed.
, a new window will appear with a copy of the ticket automatically attached. From here, you can send the ticket to staff, students, or other recipients such as parents or guardians, and include a personalized message if desired. By default, the student’s responsible party email addresses are automatically pulled from the student record, but you can remove or add additional recipients as needed.
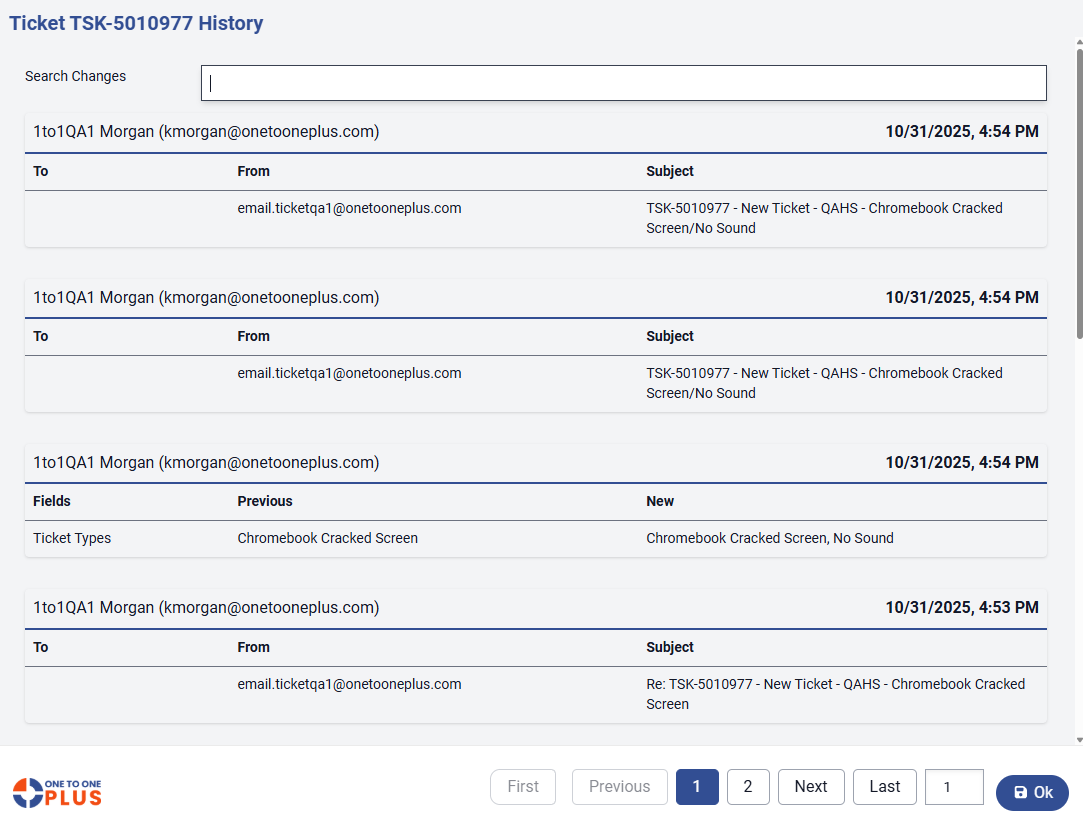
Click the ![]() button at the top right corner of the edit screen to view a detailed history of changes, including the date and time of each update and the user who made them. You can also search the log by entering keywords into the Search Changes field. If the Ticket has a large amount of activity, page numbers will appear at the bottom of the window, allowing you to navigate through multiple pages.
button at the top right corner of the edit screen to view a detailed history of changes, including the date and time of each update and the user who made them. You can also search the log by entering keywords into the Search Changes field. If the Ticket has a large amount of activity, page numbers will appear at the bottom of the window, allowing you to navigate through multiple pages.
Was this article helpful?