Edit Asset Screen
- 10 Dec 2025
- 2 Minutes to read
- Contributors


- Print
- DarkLight
- PDF
Edit Asset Screen
- Updated on 10 Dec 2025
- 2 Minutes to read
- Contributors
- Print
- DarkLight
- PDF
Article summary
Did you find this summary helpful?
Thank you for your feedback!
The Edit Asset screen appears whenever you click on an asset record. It allows you to update asset details and view all relevant information, including activity logs and any tickets linked to the asset.
An asset record is divided into six collapsible sections. The two most important are Asset Information and Assigned/Held Information, which contain key details such as asset identifiers and user assignments. The other four sections—Purchasing Information, Device Information, Related Files, and Custom Fields—hold additional, optional data. The Status field is required and defaults to Active.
All asset fields can also be imported via Excel files. Note that files uploaded under Related Files must not exceed 10 MB.
If any changes are made on the Edit Asset Screen, be sure to click the ![]() button, located either at the top right or bottom left of the page, to save your changes.
button, located either at the top right or bottom left of the page, to save your changes.
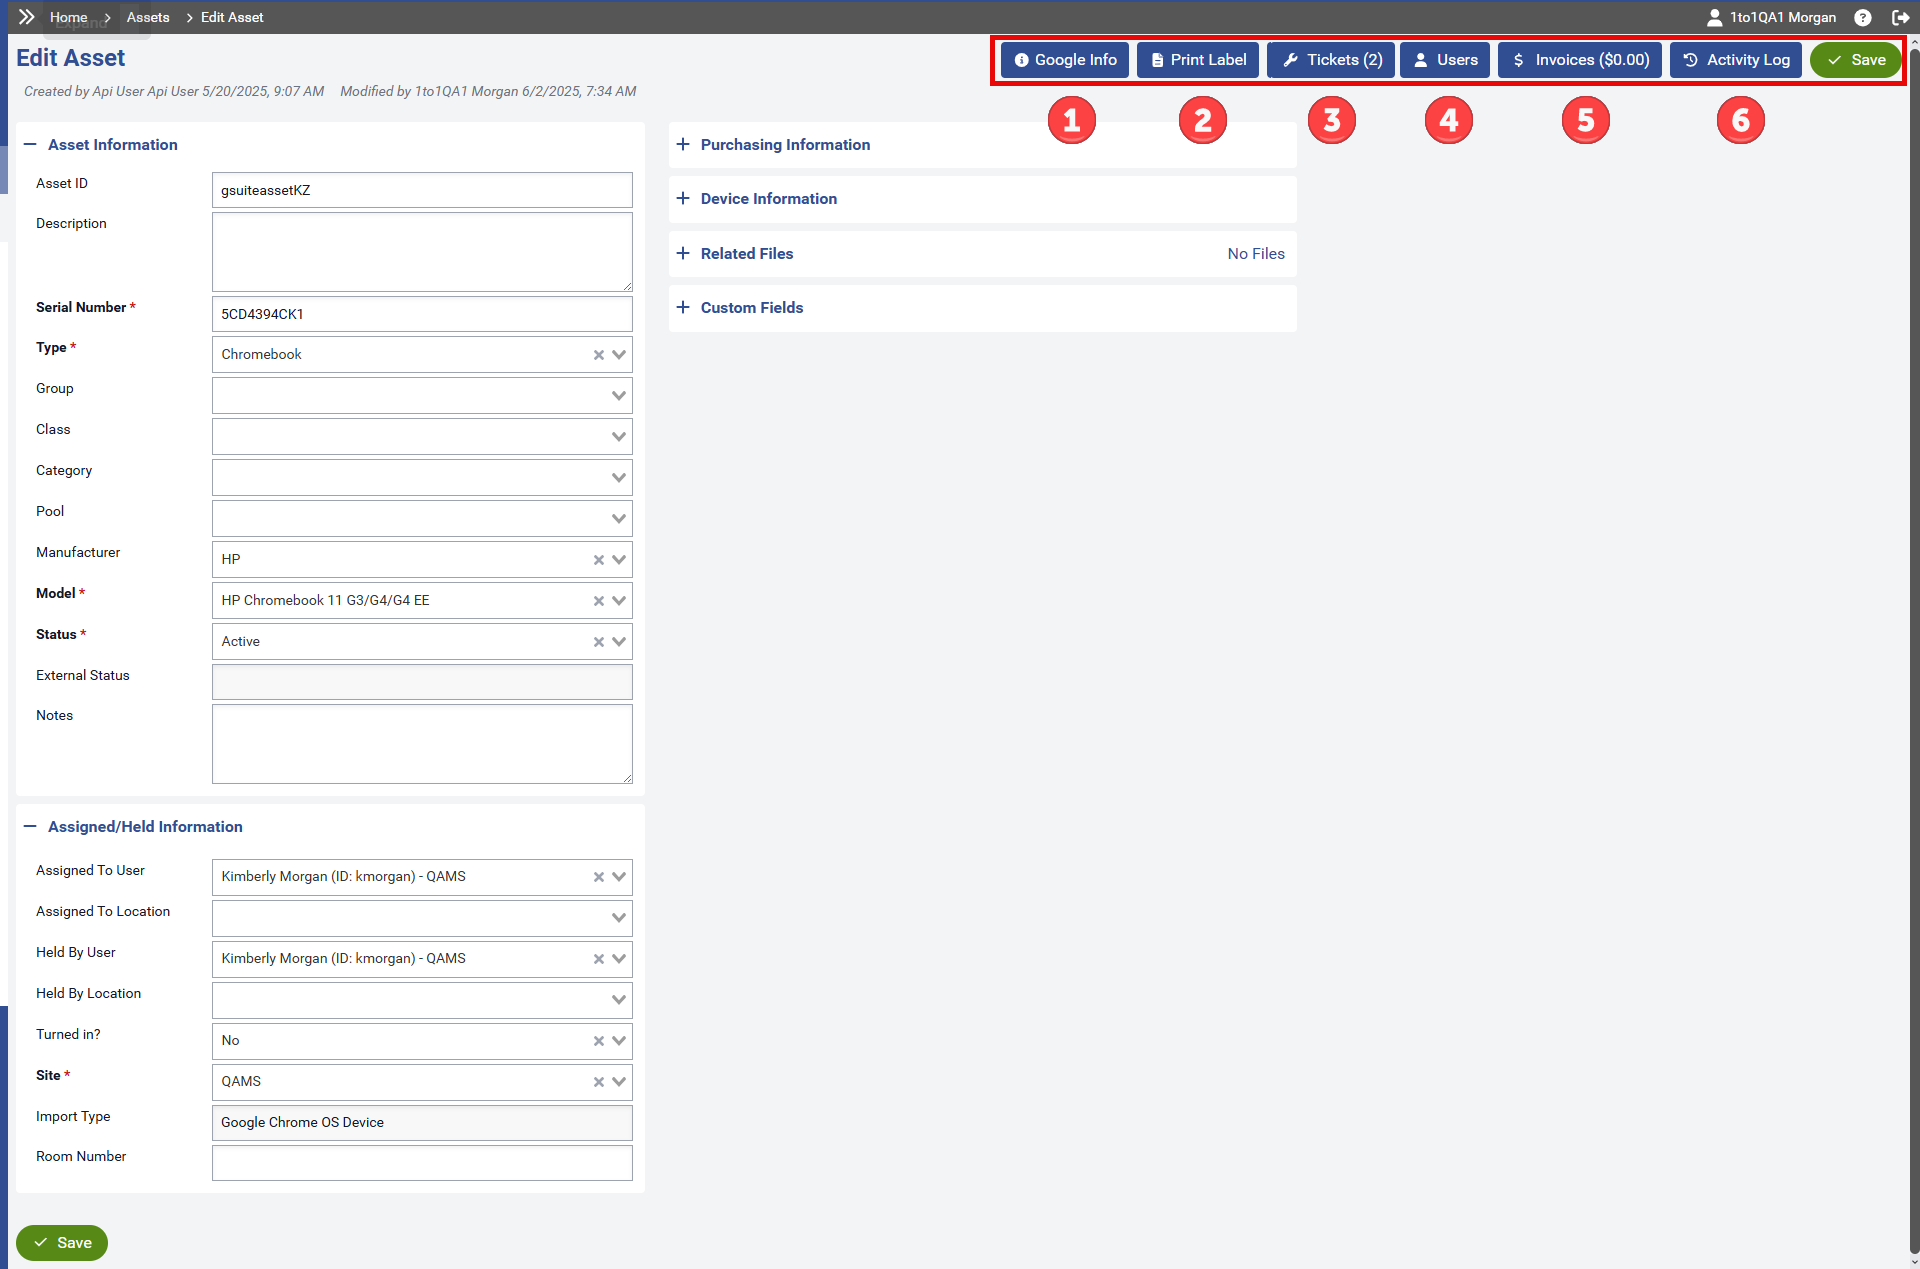
The fields in the image above are numbered to match the list below:
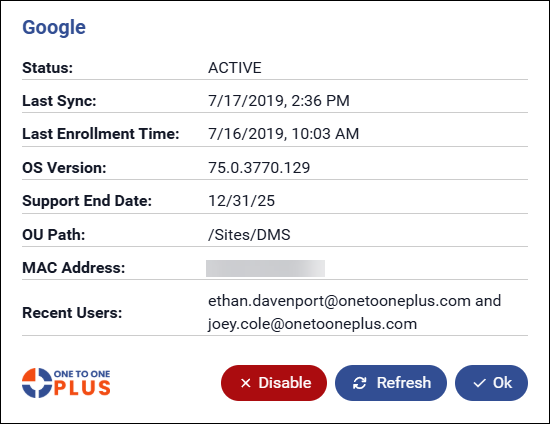
Google Info: If the asset is linked to a Google import, this button will appear. Clicking it will display specific details about the asset and give you the option to disable it from being included in future imports.
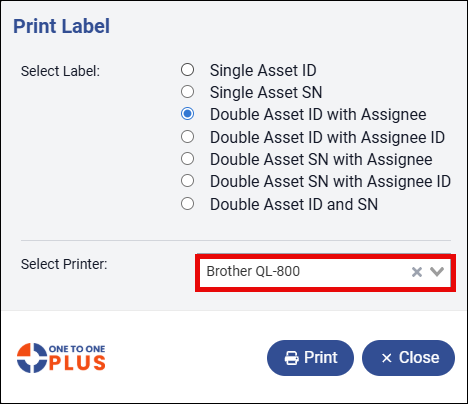
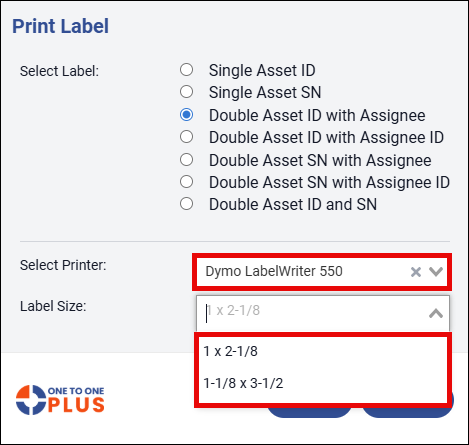
Print Label: Clicking the Print Label button opens the screen shown below. From there, you can choose the information to include on the label by selecting an option and clicking Print. A label printer must be set up and connected to complete the printing process. If printing to the Dymo printer, a drop down option will now appear to select the Label Size.
Tickets (#): Clicking the Tickets button opens the screen shown below. This view displays all information related to tickets submitted for the selected asset. You can access a specific ticket by clicking the TSK number in the highlighted area or by clicking the icon under the Actions column—both options will take you directly to the ticket details.

Users: Clicking the Users button opens the screen shown below. From this view, you can see when the asset was assigned, whether the Assigned To or Held By status has been updated, and which user is currently assigned the asset.

Invoices: Clicking the Invoices button opens the screen shown below. Here, you can view any invoices associated with the asset. To access a specific invoice, simply click the icon under the Actions column.

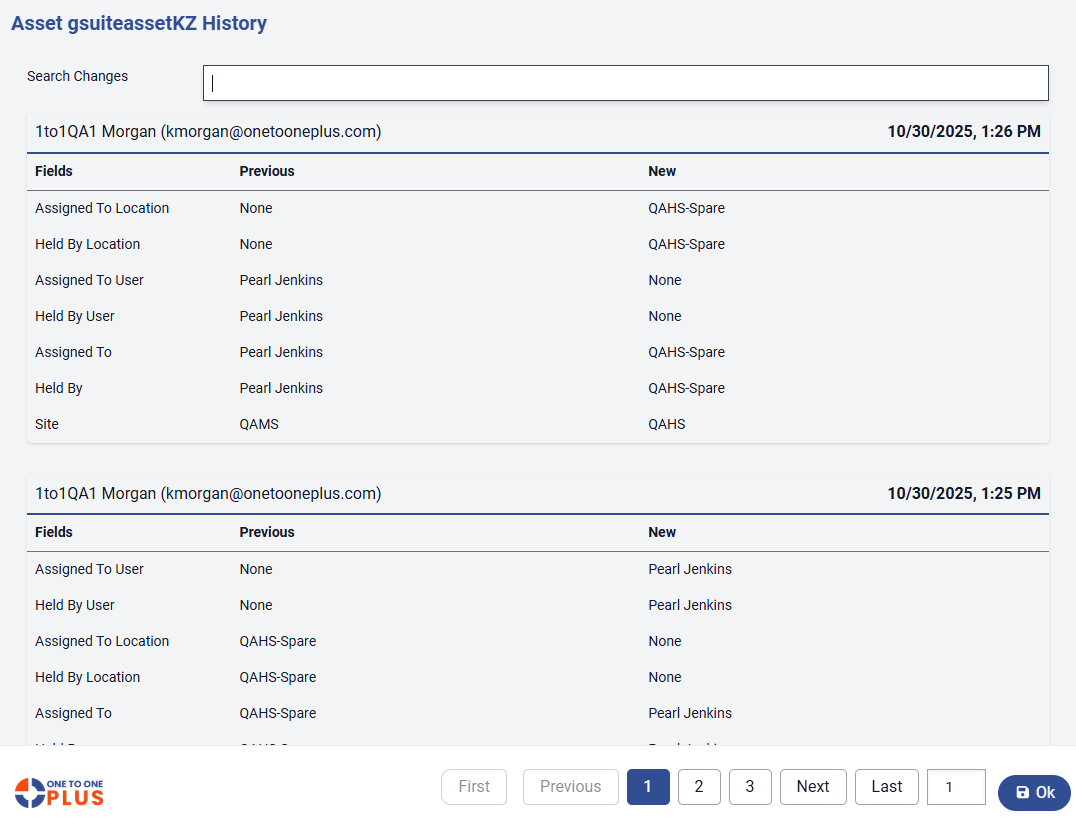
Activity Log: Clicking the Activity Log button opens the screen shown below. This log displays all changes made to the asset, including what was changed, when the change occurred, and the user responsible. It records every change made, along with the time of the change and the user who made the change. You can also search the log by entering keywords into the Search Changes field. If this asset has a large amount of activity, page numbers will appear at the bottom of the window, allowing you to navigate through multiple pages.
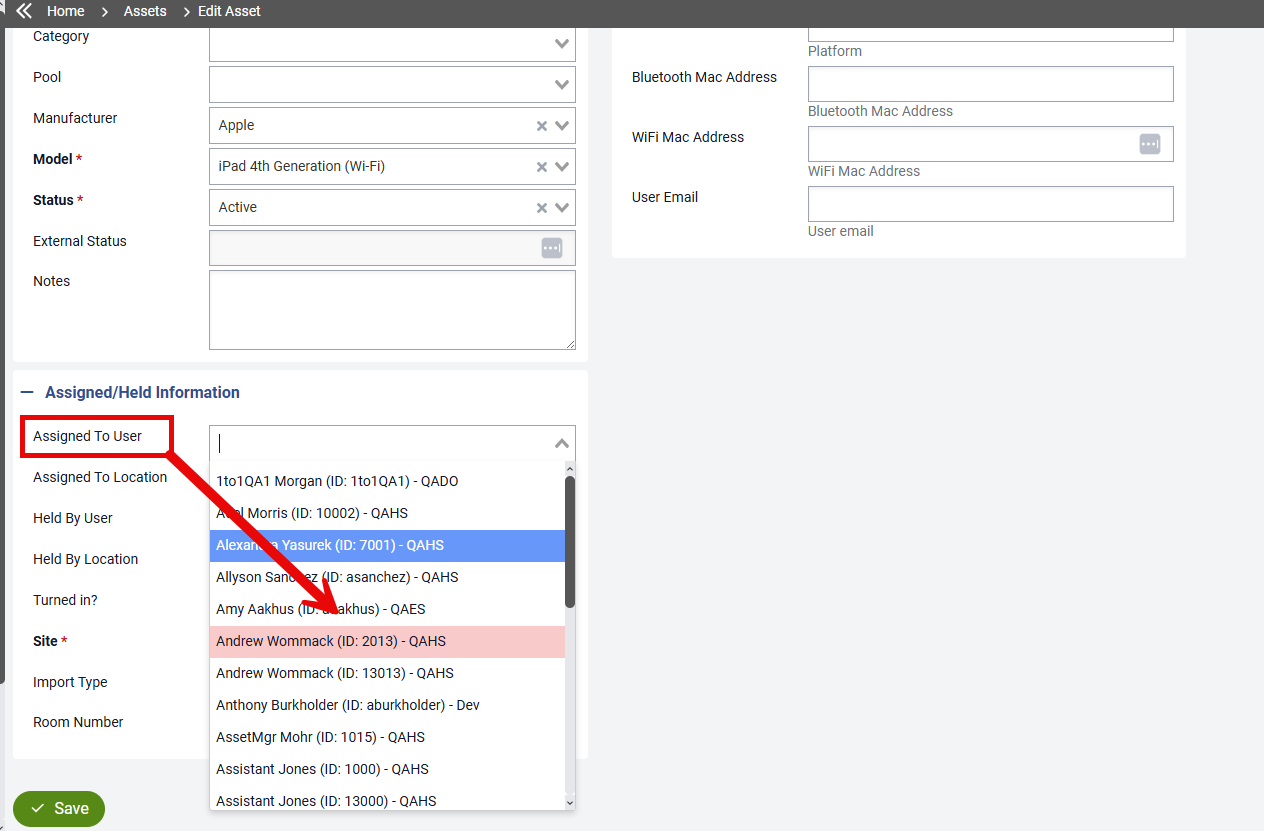
When assigning an Asset to a user, users that are Inactive will be highlighted in red.
If you make any changes on the Edit Asset screen, be sure to click the ![]() button—located in either the top right or bottom left of the page—to ensure your updates are saved.
button—located in either the top right or bottom left of the page—to ensure your updates are saved.
Was this article helpful?