Bulk Assign Assets
- 20 Aug 2025
- 2 Minutes to read
- Contributors

- Print
- DarkLight
- PDF
Bulk Assign Assets
- Updated on 20 Aug 2025
- 2 Minutes to read
- Contributors
- Print
- DarkLight
- PDF
Article summary
Did you find this summary helpful?
Thank you for your feedback!
The Bulk Assign screen allows you to assign multiple assets at once to a specific location, such as returning items to school inventory. To begin, choose an Asset Identifier Type—either Asset Serial Number (S/N) or Asset ID—to determine how the assets will be matched during the assignment.
If needed, you can also capture signatures as part of the process.
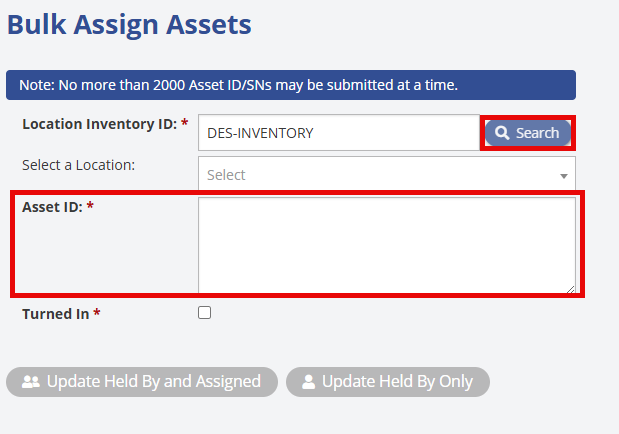
You’ll need to copy and paste the relevant Asset IDs or Serial Numbers from an Excel file to identify which assets should be assigned. The easiest way to gather this information is by exporting the desired assets from the Manage Assets screen. A maximum of 2,000 assets can be submitted per bulk assignment.
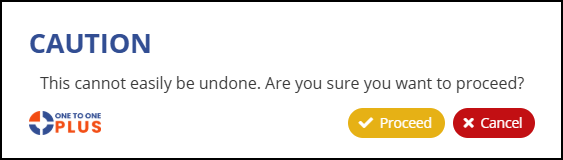
Note: UPDATING ASSETS IN BULK IS NOT EASILY UNDONE. Please proceed with caution and ensure your data is accurate before continuing.
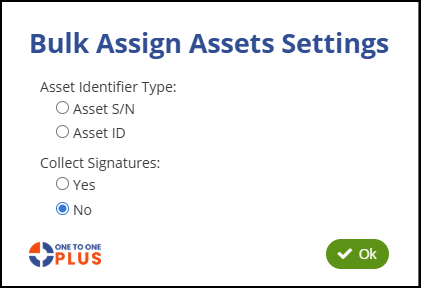
To get started, click the Bulk Assign tab to open the Bulk Assign Assets Settings screen. Select either Asset S/N or Asset ID as your identifier type for the bulk assignment.
If you need to collect signatures during the assignment process, enable the Collect Signatures option by selecting Yes.
Once your settings are configured, click the  button to continue.
Next, enter the Location Inventory ID where you want to assign the assets, or click the blue Search button to open the Select a Location dropdown menu. After selecting the desired location, copy and paste the appropriate Asset IDs or Serial Numbers into the corresponding Asset ID or Asset S/N field.
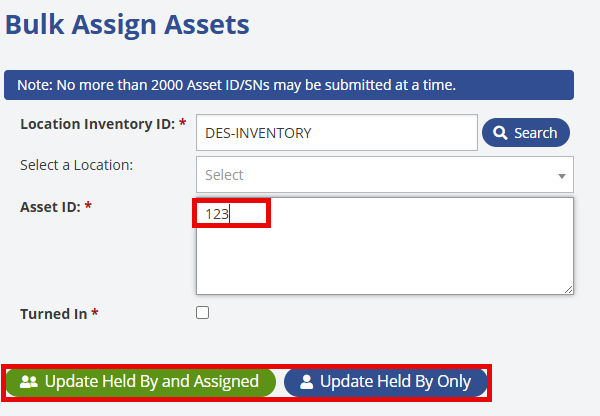
Once you’ve entered the Asset IDs or Asset Serial Numbers into the field, the Update Held By and Assigned and Update Held By Only buttons will become active. Typically, the recommended option is Update Held By and Assigned, as it updates both the current holder and the assignment details. However, if you want to return the asset to inventory while keeping the original user assignment intact, you can choose Update Held By Only instead.
Next, a Caution pop-up will appear, warning you that this action cannot be easily undone. If you’ve confirmed that the correct assets are selected and the correct location is assigned, click ![]() to continue. If you need to make changes, click
to continue. If you need to make changes, click  to return to the previous screen.
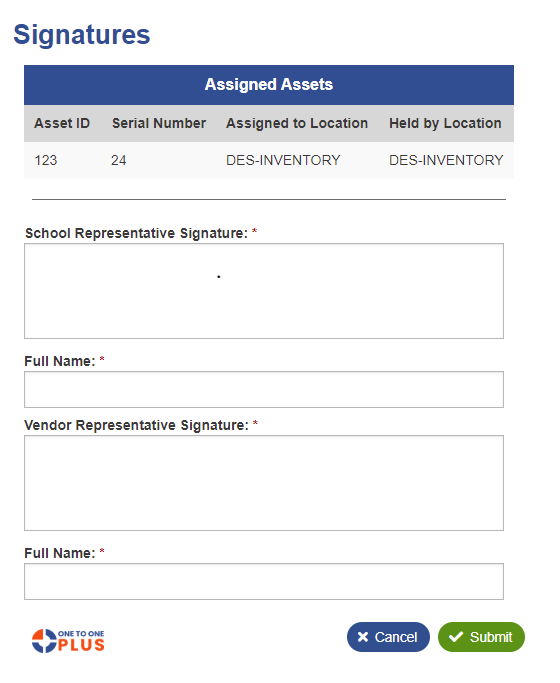
After clicking Proceed, if you selected the option to collect signatures at the start of the process, the Signatures screen will appear, allowing you to complete the required signature. Once finished, click  to finalize the assignment. If you did not choose to collect signatures, this step will be skipped and the assignment will be processed automatically.
Was this article helpful?