Assigning Assets with Accessories
- 20 Nov 2025
- 2 Minutes to read
- Contributors


- Print
- DarkLight
- PDF
Assigning Assets with Accessories
- Updated on 20 Nov 2025
- 2 Minutes to read
- Contributors
- Print
- DarkLight
- PDF
Article summary
Did you find this summary helpful?
Thank you for your feedback!
The Assign screen allows users to assign one or more assets to a student, staff member, or location. Designed for efficient use with barcode scanners, it streamlines the asset assignment process.
Accessories, which is generally a charger or case, can be assigned along with the asset itself. When assigning accessories this way, the accessory is NOT considered an asset but can be assigned to the user along with the asset to track whether they received a charger/case or not. You can view any assigned accessories by navigating to the student's or staff member's profile.
When assigning accessories, you need to enable certain settings to allow this functionality.
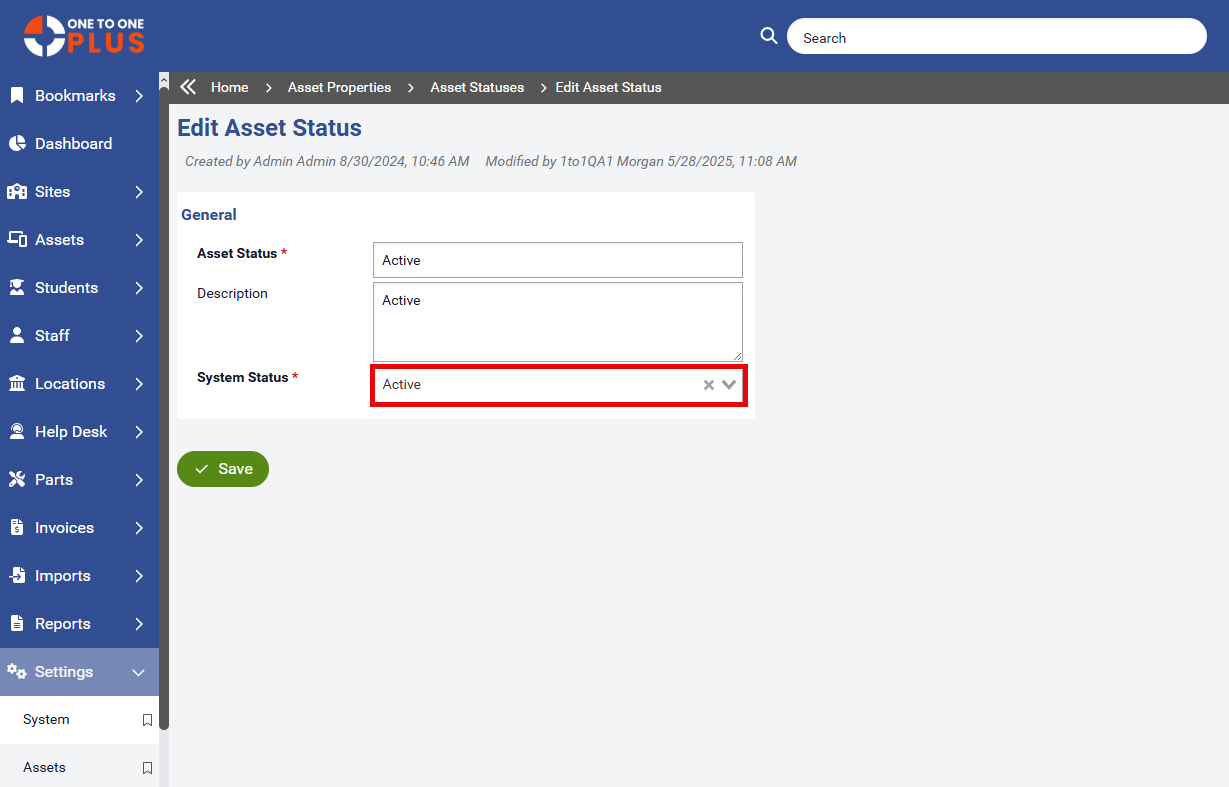
The assign asset screen will verify the system status that is set in the Settings > Assets > Status screen and will display a message if it is not set to active.
On the assign screen, click the Settings button in the upper right hand corner.
.png)
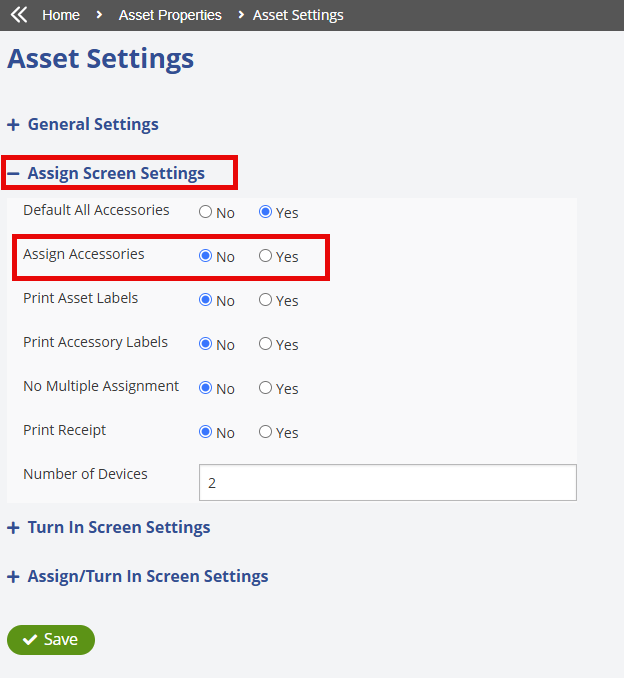
Then click Assign Screen Settings to expand it.
In this section, you will see an option called Assign Accessories with a Yes/No option. Click Yes to turn on the ability to assign accessories. Then click ![]() to save your selection. To get back to the assign screen just click the Assign tab again on the left side.
to save your selection. To get back to the assign screen just click the Assign tab again on the left side.
Once back on the Assign screen, you should now see the Accessories to be Assigned section above the asset assignment section.

From this point, you can begin assigning your asset(s) and accessories.
Begin by selecting the checkboxes for the accessories you want to assign. Your selections will remain saved, so you won’t need to reselect them for each asset.
Scan or manually enter the Location or User ID in the Location/User ID field. If the User ID is unknown, use the Search box to look up the user by name.
Scan or manually enter the Asset ID or Serial # in the Asset ID/SN field.
Ensure the Submit Action field is defaulted to Held by and Assigned. (The default Action can be changed in the system settings)
Held by and Assigned should be the selection here unless you want to update the Held by field ONLY. For example, if a student's device is returned at the end of the school year and they will be assigned that same device the following school year. That device's Held by field can be updated to be held by school inventory over the summer then reassigned to the student in the Fall.
Click the
 button to complete the asset assignment. You can also click the
  button to clear out the previously mentioned fields.
To see the accessories that were assigned, navigate to the student or staff member’s profile and click on the Related Assets section to expand it. There, you’ll see both the assigned asset and any associated accessories.
.png)
Was this article helpful?