Manage Asset Screen
- 02 Dec 2025
- 2 Minutes to read
- Contributors


- Print
- DarkLight
- PDF
Manage Asset Screen
- Updated on 02 Dec 2025
- 2 Minutes to read
- Contributors
- Print
- DarkLight
- PDF
Article summary
Did you find this summary helpful?
Thank you for your feedback!
The Manage Assets screen allows you to view all assets in one place or apply filters to display only the assets you need. Use the Search box to quickly find specific items. You can also customize the visible columns to show only the information most relevant to you. From this screen, you can export asset files and manually add new assets as needed.

Each button's purpose/functionality is described below:
Columns: Clicking the Columns button opens a dropdown menu where you can select which columns to display on the screen. You can choose as many or as few as you need to customize your view.
My Views: Allows users to create custom saved filters that can be applied at any time to quickly sort and access relevant data.
Export: Clicking the Export button downloads the data based on any filters you’ve applied. The exported file will include only the columns currently visible on your screen.
Print All: Clicking the Print All button allows you to print notices for students regarding their assigned assets—whether for end-of-year returns or other times throughout the school year. Only the data currently filtered on the screen will be included in the printout. You can customize the message displayed on these notices by updating the custom message box in Asset Settings.
Email All: Clicking the Email All button allows you to send emails to users with assigned assets. This feature is available only to Admin users and must be activated by Support before it can be used.
Add: Clicking the Add button enables you to add a new asset to the system.
 Displays the manage screens in full-screen mode. Press Alt + F to toggle between full-screen and the standard view.
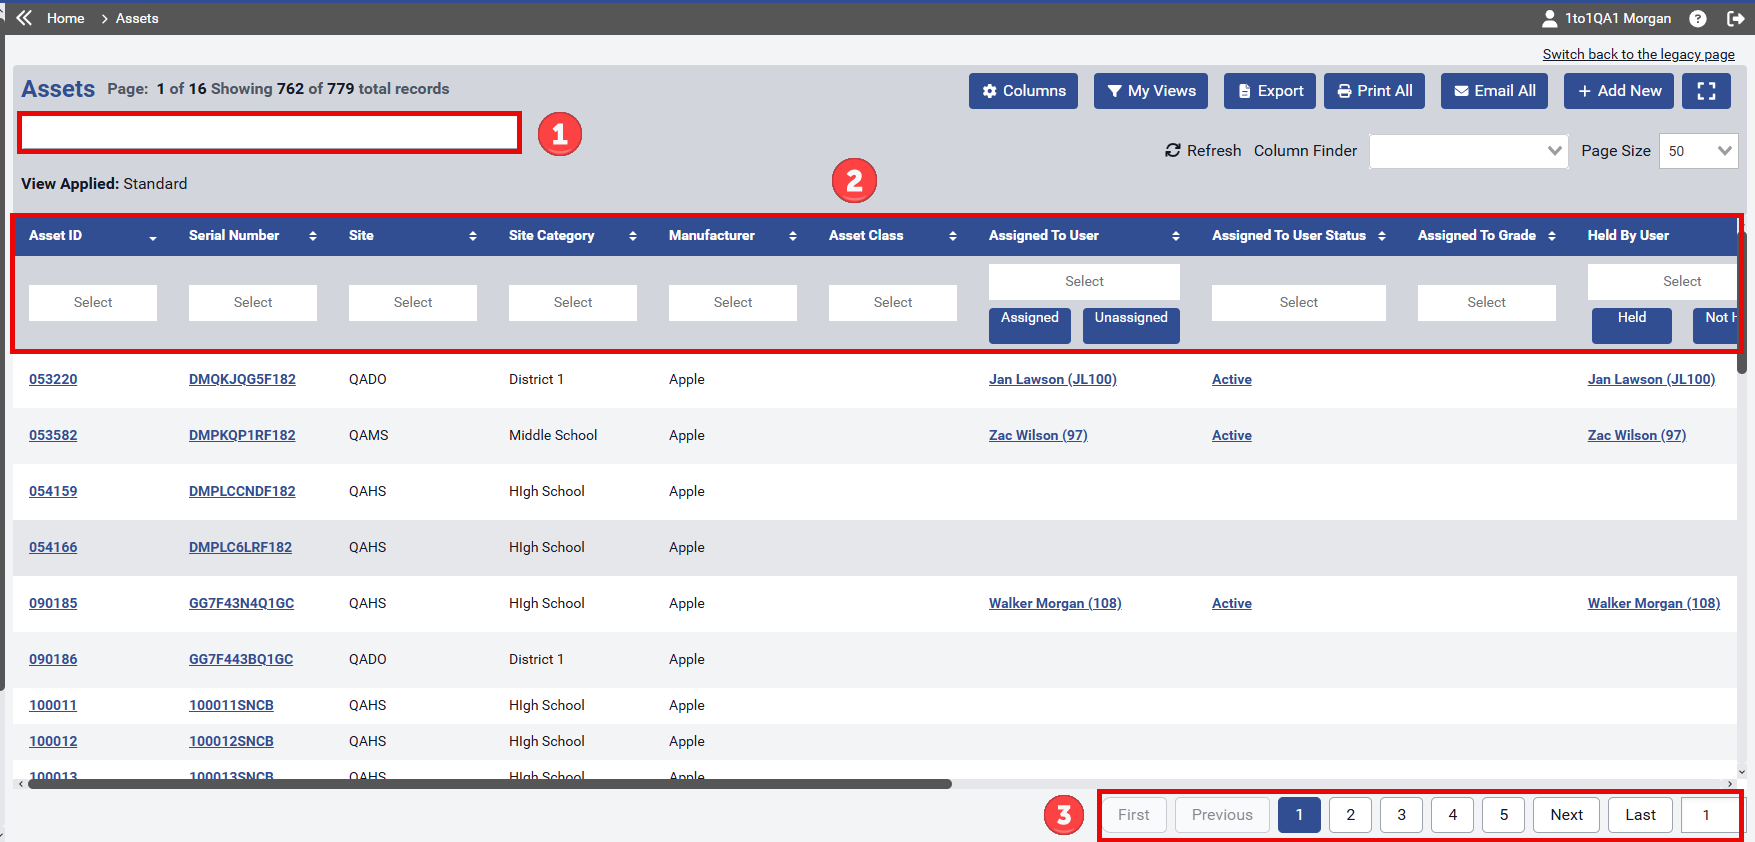
Search bar: The Search bar allows you to enter asset information—such as Asset ID, Serial Number, Asset Type, and more—to quickly locate matching records. It searches across both Active and Inactive assets. To begin the search, press Enter. Note that you can only search within columns that are sortable, indicated by up and down arrows next to the column headers.

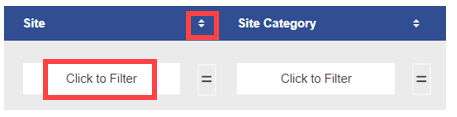
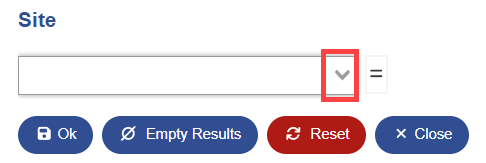
Column Header/Filters: Any column with Up and Down arrows next to its name can be sorted by that column. Some columns support free-text searching, while others provide a dropdown list of options when you click in the search box. Columns with an equal sign (=) next to them allow you to apply a "NOT" filter to exclude certain results. The columns available for filtering correspond to the columns you have selected via the Columns button. By default, records on this page are filtered to show only those with a status of Active.
Page Number: Indicates the current page number within the selected data, with the active page highlighted in Blue. You can navigate by clicking individual page numbers or by using the Next and Previous buttons. The first and last page numbers are always visible, allowing you to quickly jump to the beginning or end of the data set.
At the end of the column header row, the Clear Filters button allows you to remove all active filters on the page

Was this article helpful?