Add New Payment
- 25 Nov 2025
- 1 Minute to read
- Contributors

- Print
- DarkLight
- PDF
Add New Payment
- Updated on 25 Nov 2025
- 1 Minute to read
- Contributors
- Print
- DarkLight
- PDF
Article summary
Did you find this summary helpful?
Thank you for your feedback!
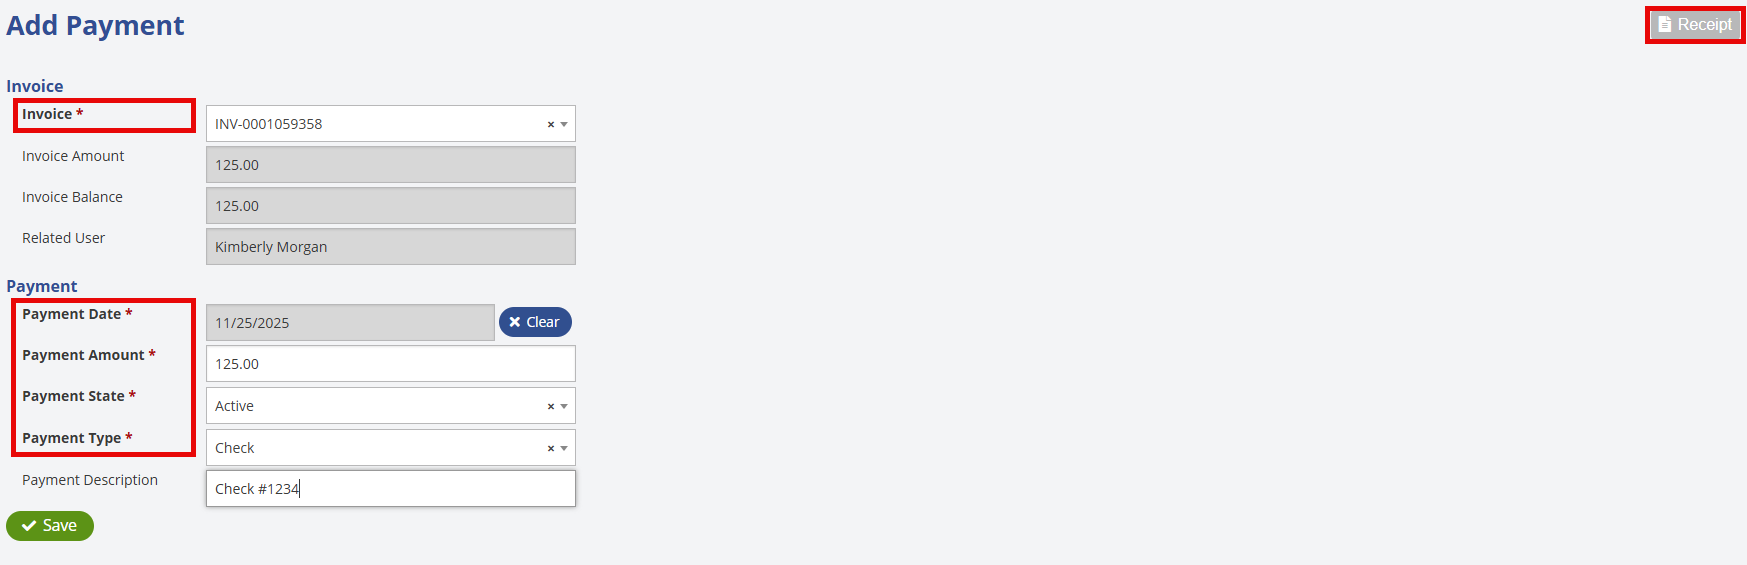
The Add New Payment screen is for adding payments to existing invoices.
Fill in the required fields indicated by the * on the screen. The "Date" field will pop up a calendar when you click in that field for you to input the date. The darker greyed out fields such as Invoice Amount and Invoice Balance will populate automatically when you choose an invoice number. Notice that the Receipt button in the top right is greyed out until the payment is created and saved.
Once you click the ![]() button, the payment is saved and applied to the invoice and the Receipt button is now available to be clicked.
button, the payment is saved and applied to the invoice and the Receipt button is now available to be clicked.
Clicking the Receipt button will pop up a window showing the paid amount and the remaining balance on the receipt. You can also Email, Download, or Print the receipt from this screen. Clicking the User Invoices button will take you back to the invoices screen to choose another invoice if you would like. 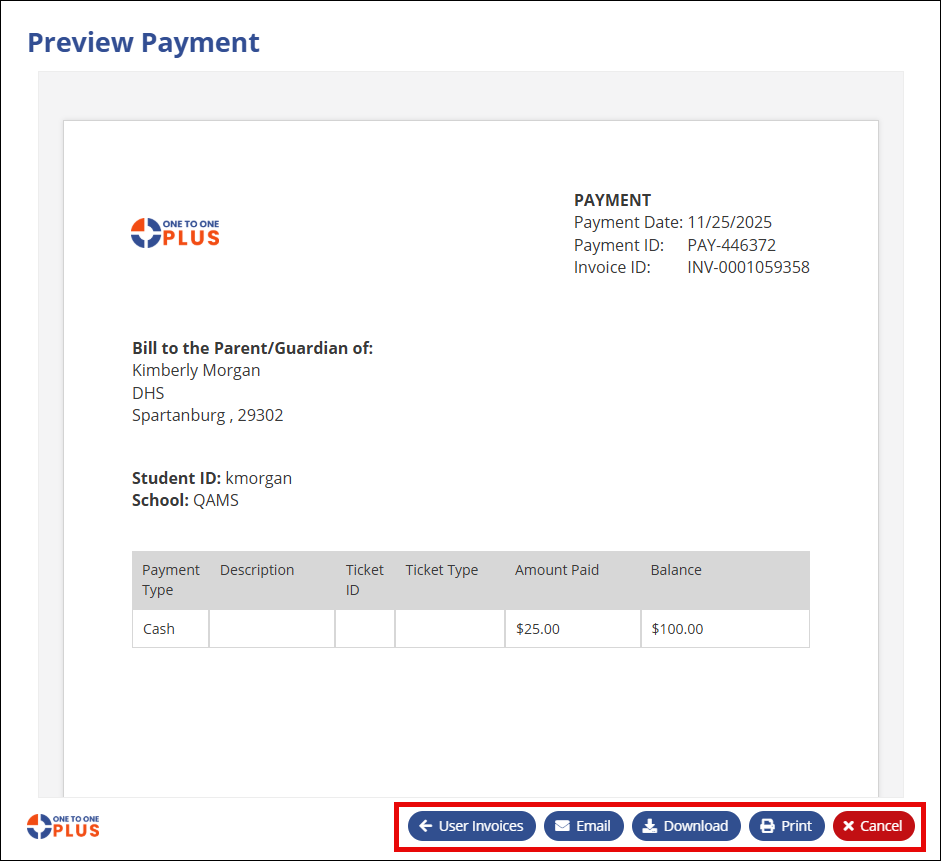
Was this article helpful?